Building From Source
Building the toolkit from source, you’ll be able to modify and customize WhirlyGlobe-Maply, and your changes will immediately be compiled into your project. If you plan on modifying this toolkit, building from source is your best option.
Clone Git Repository
First you will want to clone the toolkit from Github, if you have not already done so.
git clone https://github.com/mousebird/WhirlyGlobe.git
The Android portion of the SDK is in the develop branch. Check out this branch.
cd WhirlyGlobe
git checkout develop
WhirlyGlobe-Maply uses submodules for its dependencies, so you will need to initialize them as well.
If you’re using a GUI for Git, select the “recursive” option when cloning and it should take care of this.
git submodule init
git submodule update
Maply Module Reference
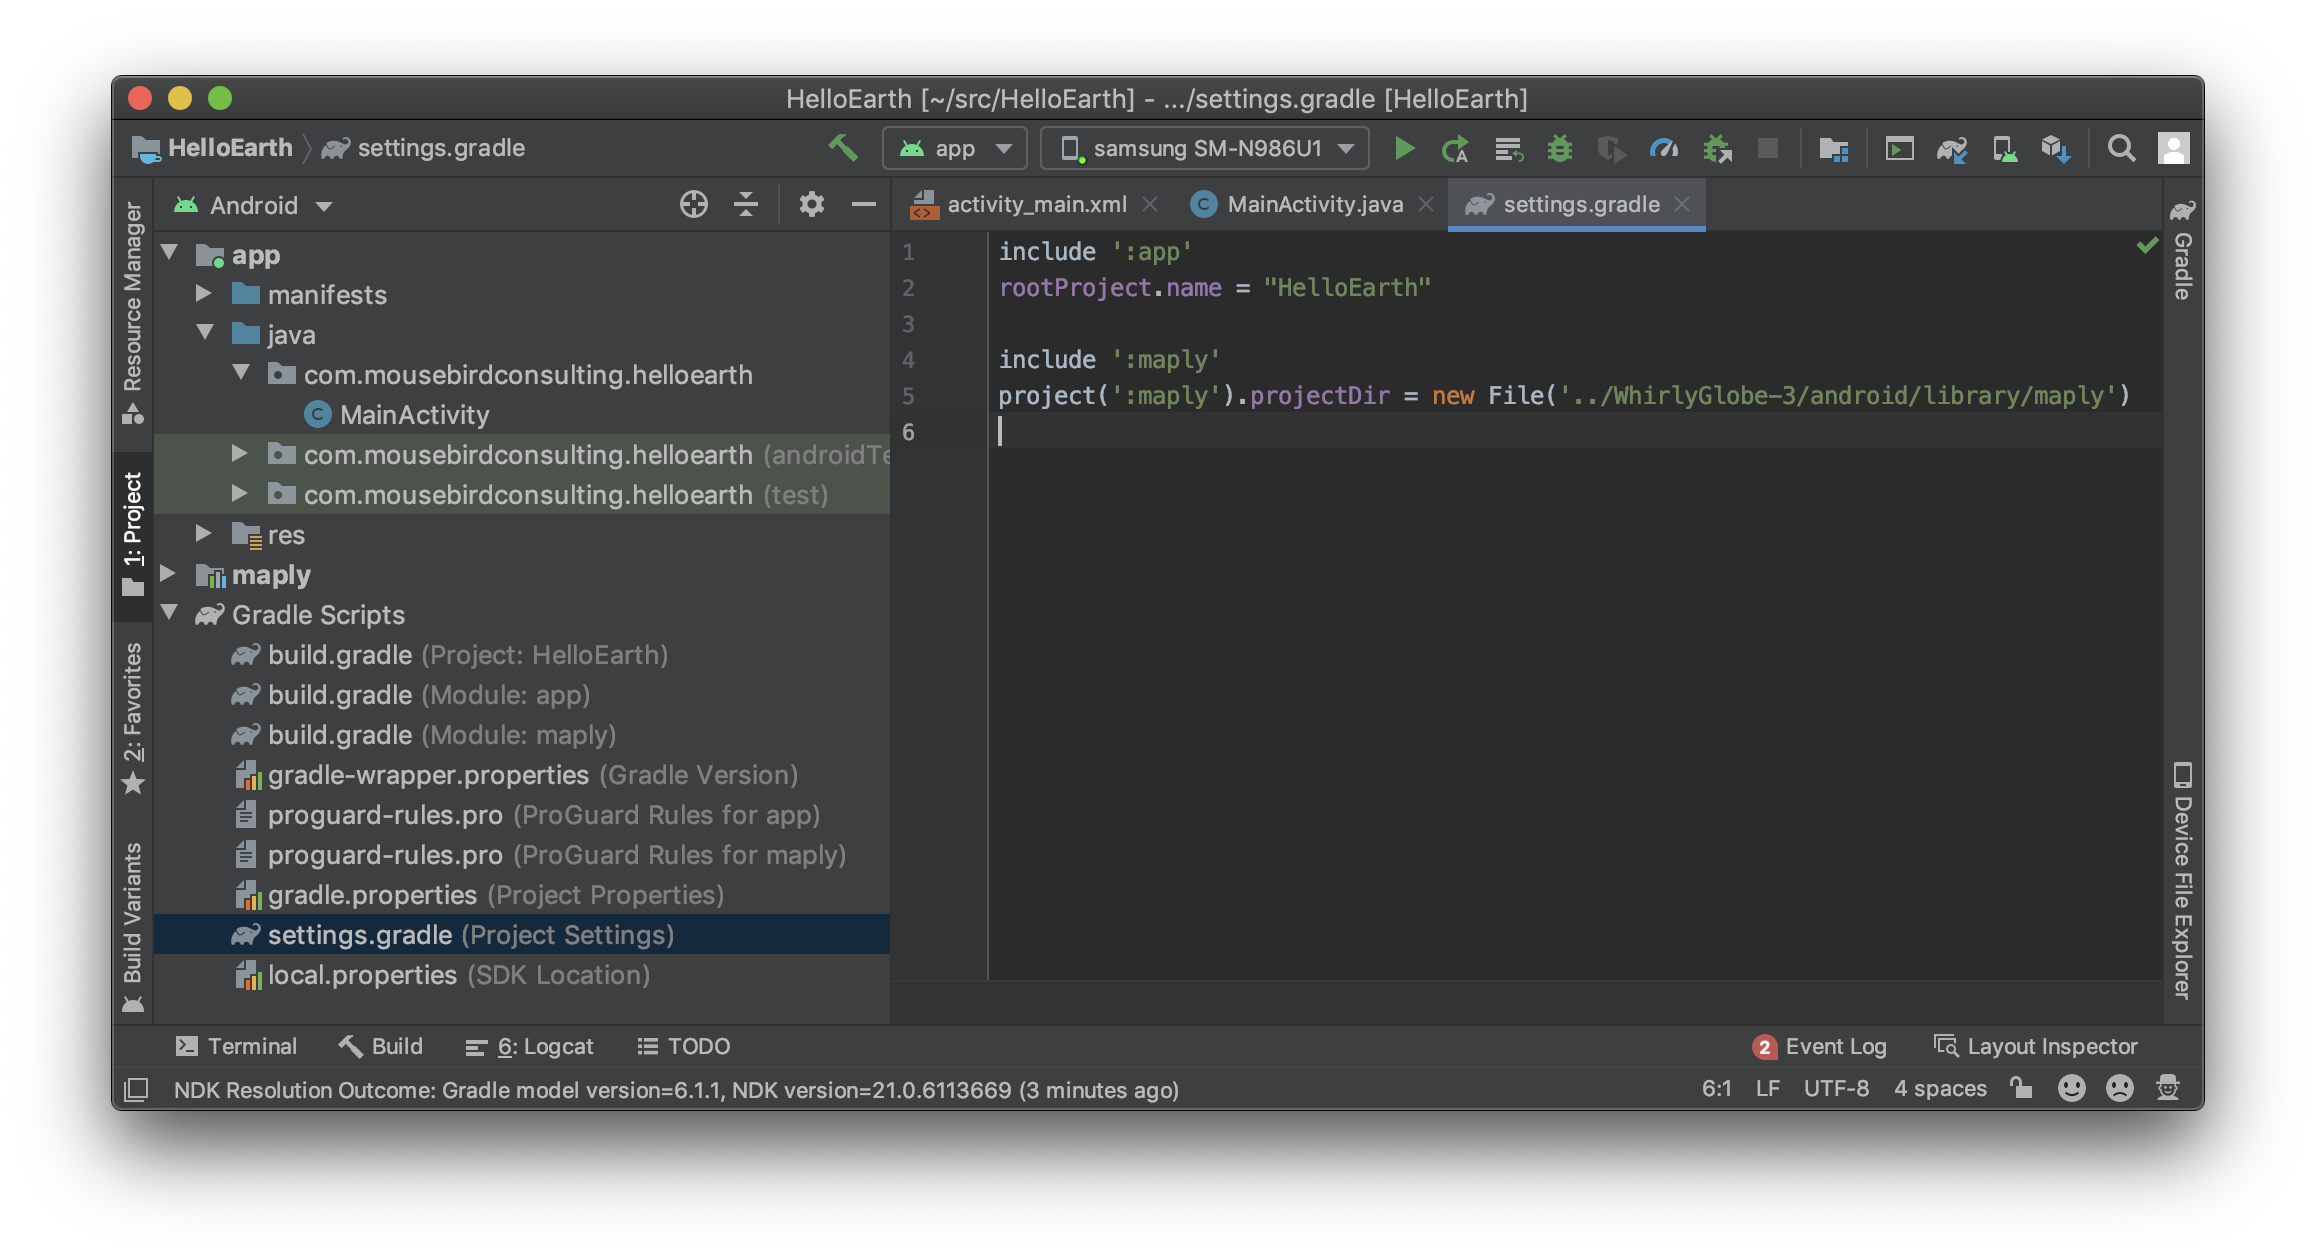
Open settings.gradle (Project Settings) and add the following lines, updating the relative path into the WhirlyGlobe repository, if necessary:
include ':maply'
project(':maply').projectDir = new File('../WhirlyGlobe/android/library/maply')
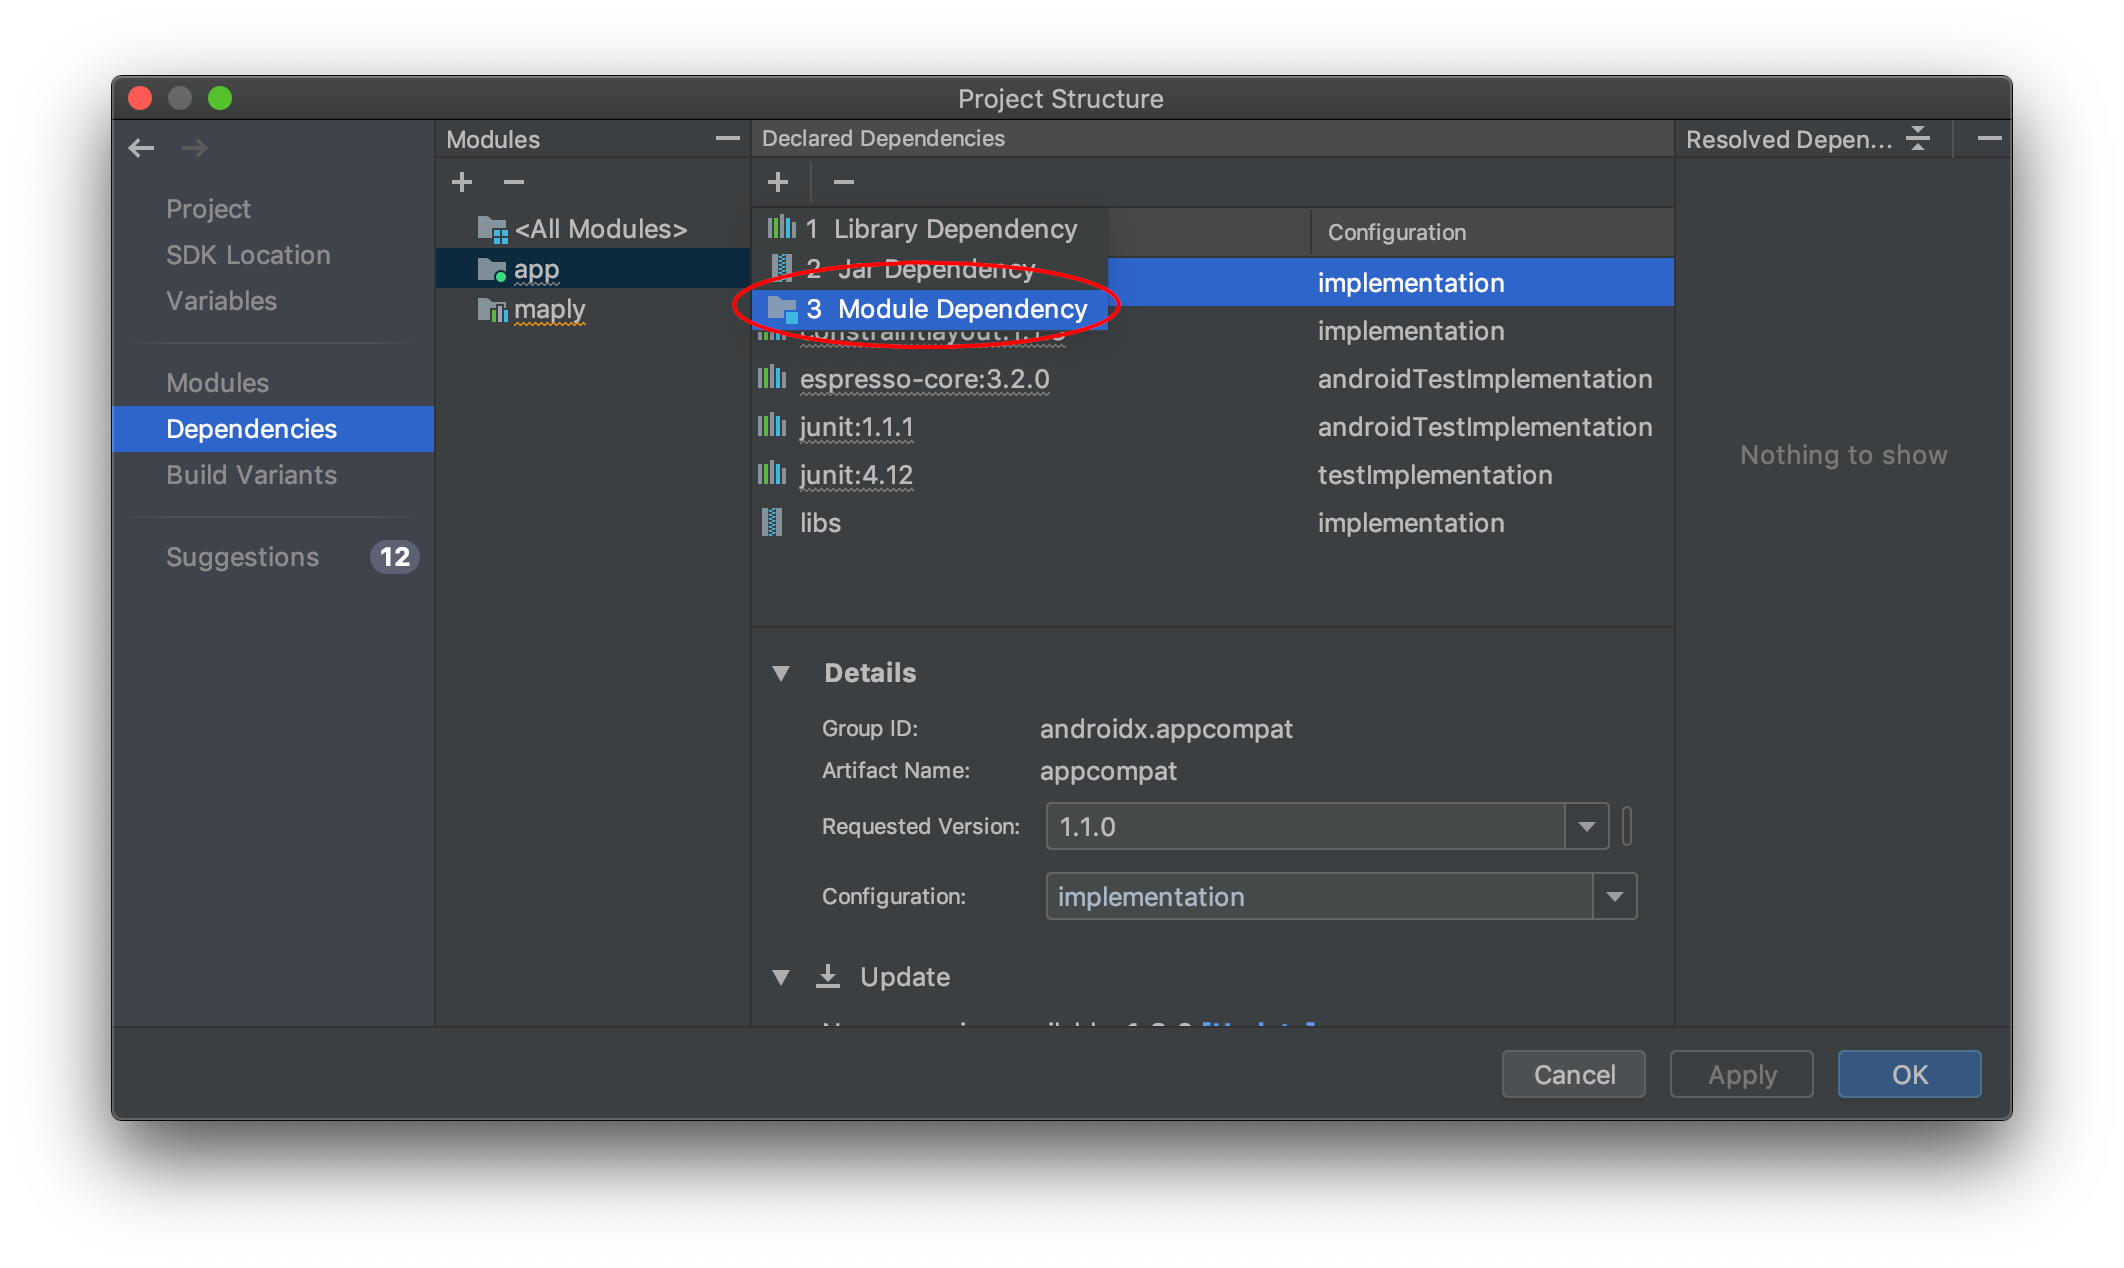
Next, open File/Project Structure, select Dependencies, select the app module, click the Add Dependency (+) button, and select Module Dependency.
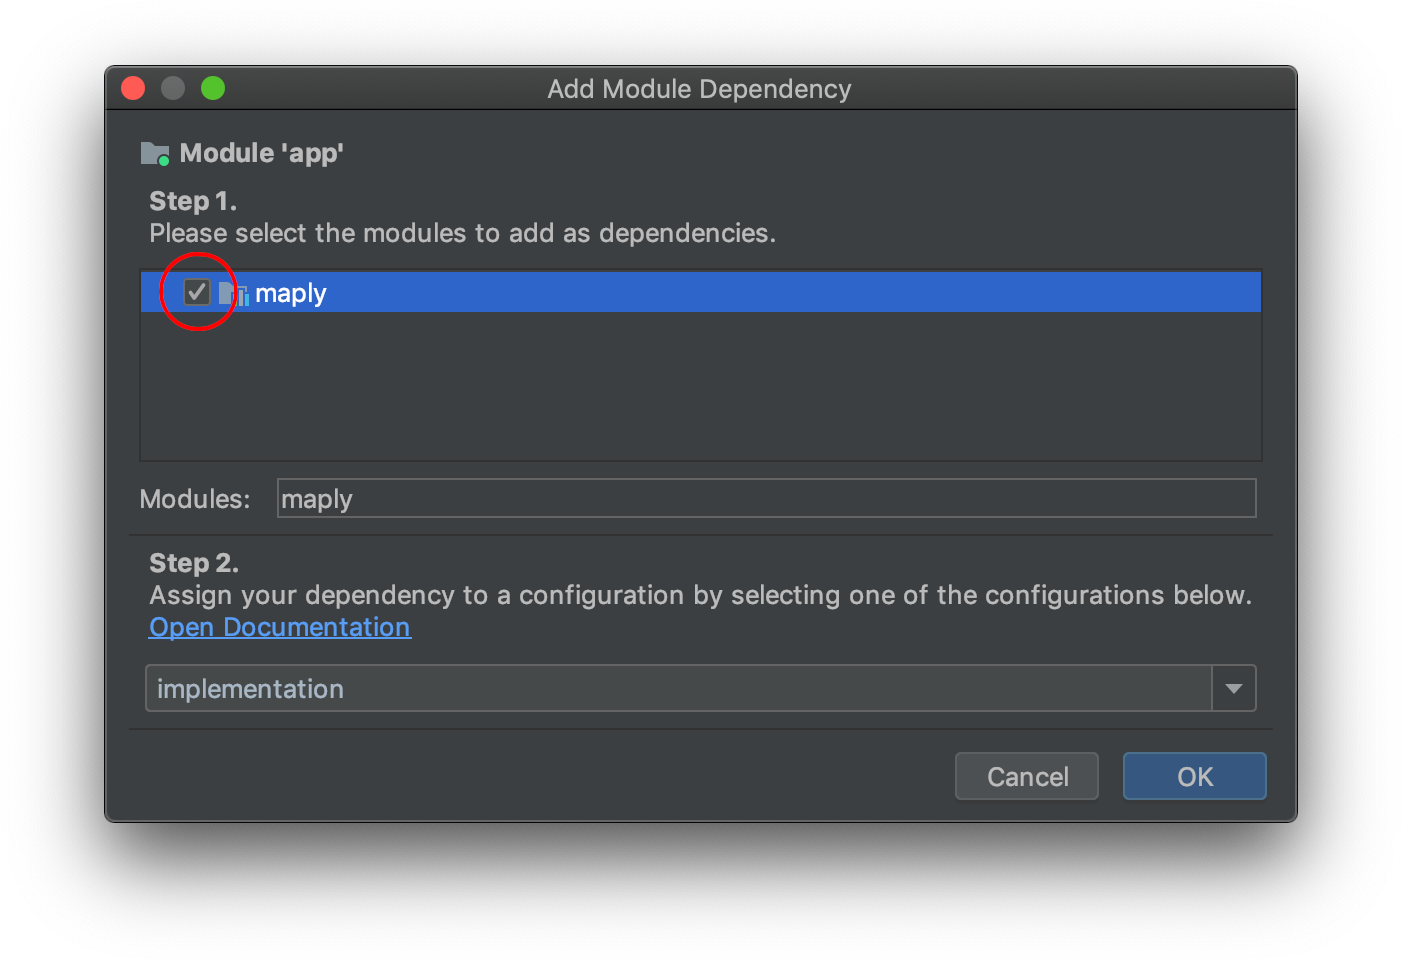
In the resulting dialog, check the box next to maply and accept.
From this point, Android Studio should build maply and use it whenever necessary while building HelloEarth.
Android SDK and NDK
The build scripts need to know the location of the Android SDK and Android NDK. Android Studio should take care of installing and/or locating an SDK directory for you, and should prompt you to install the appropriate NDK based on the version referenced by the Maply project.

If you need to adjust these settings, open Android Studio Preferences, select Appearance and Behavior, then System Settings, then Android SDK. Here you will be able to select the SDK location, which should be handled automatically, and related packages. The NDK can be found under SDK Tools, and individual NDK versions are available when the Show Package Details option is checked.
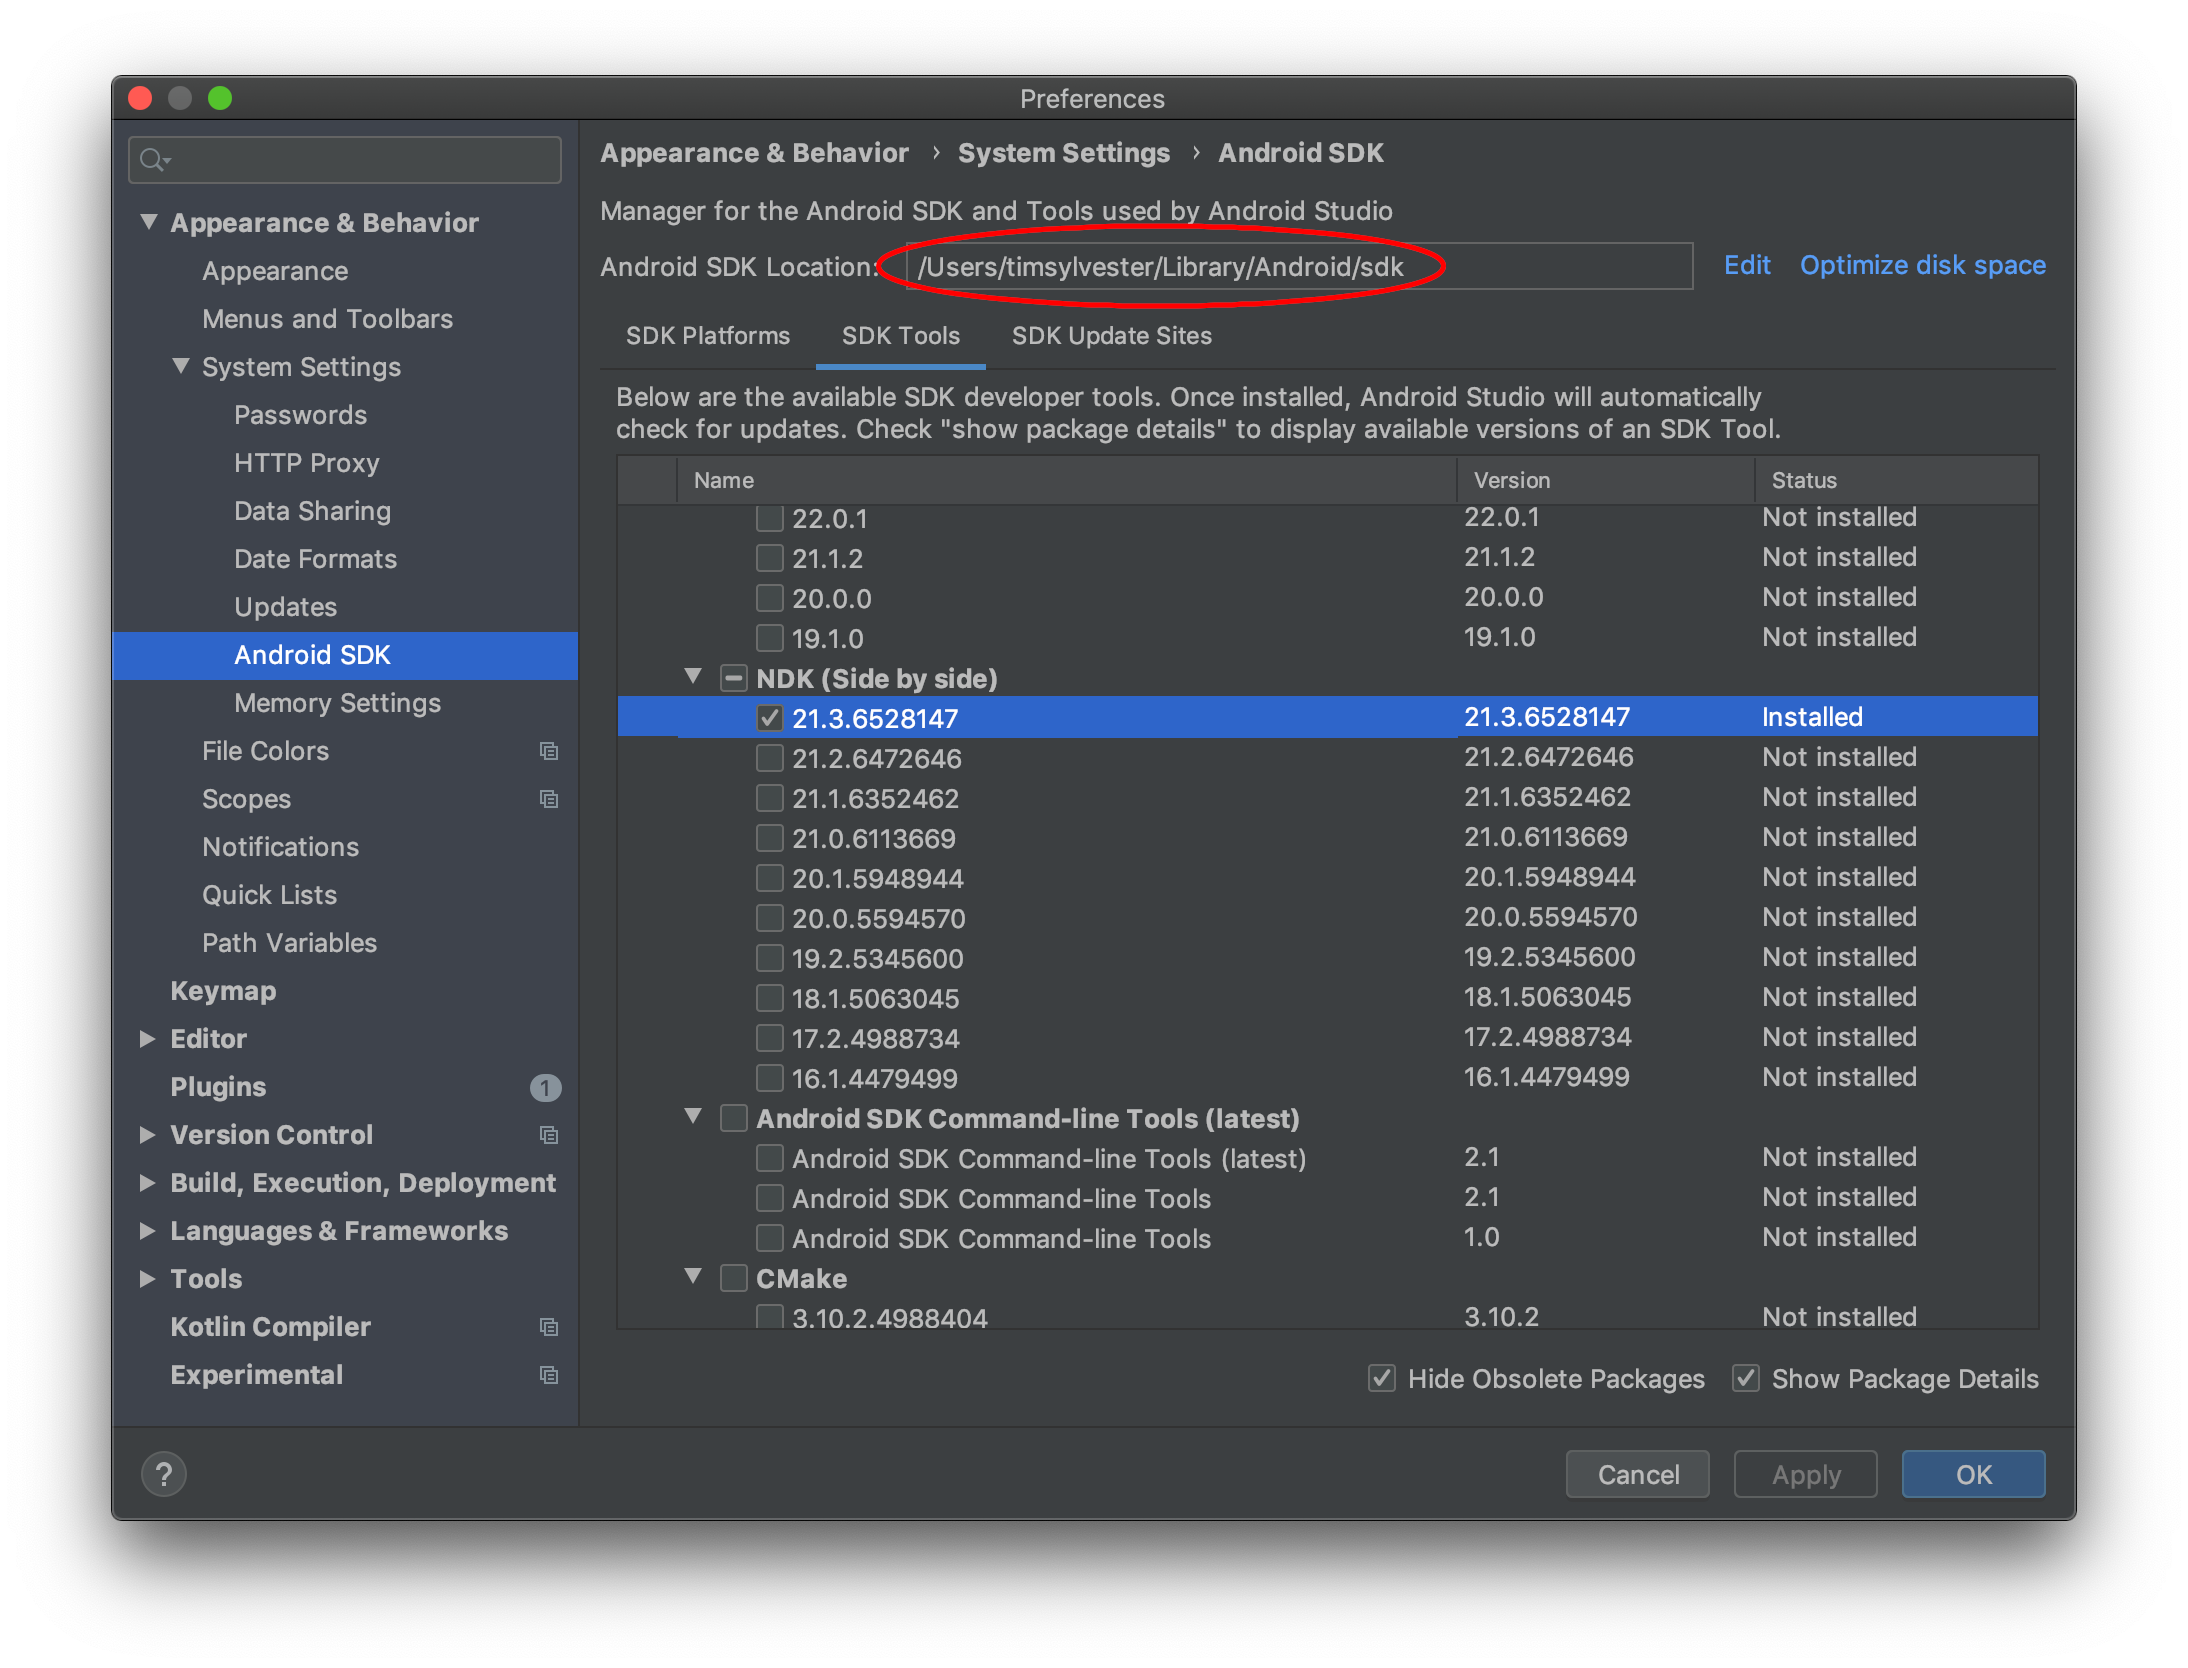
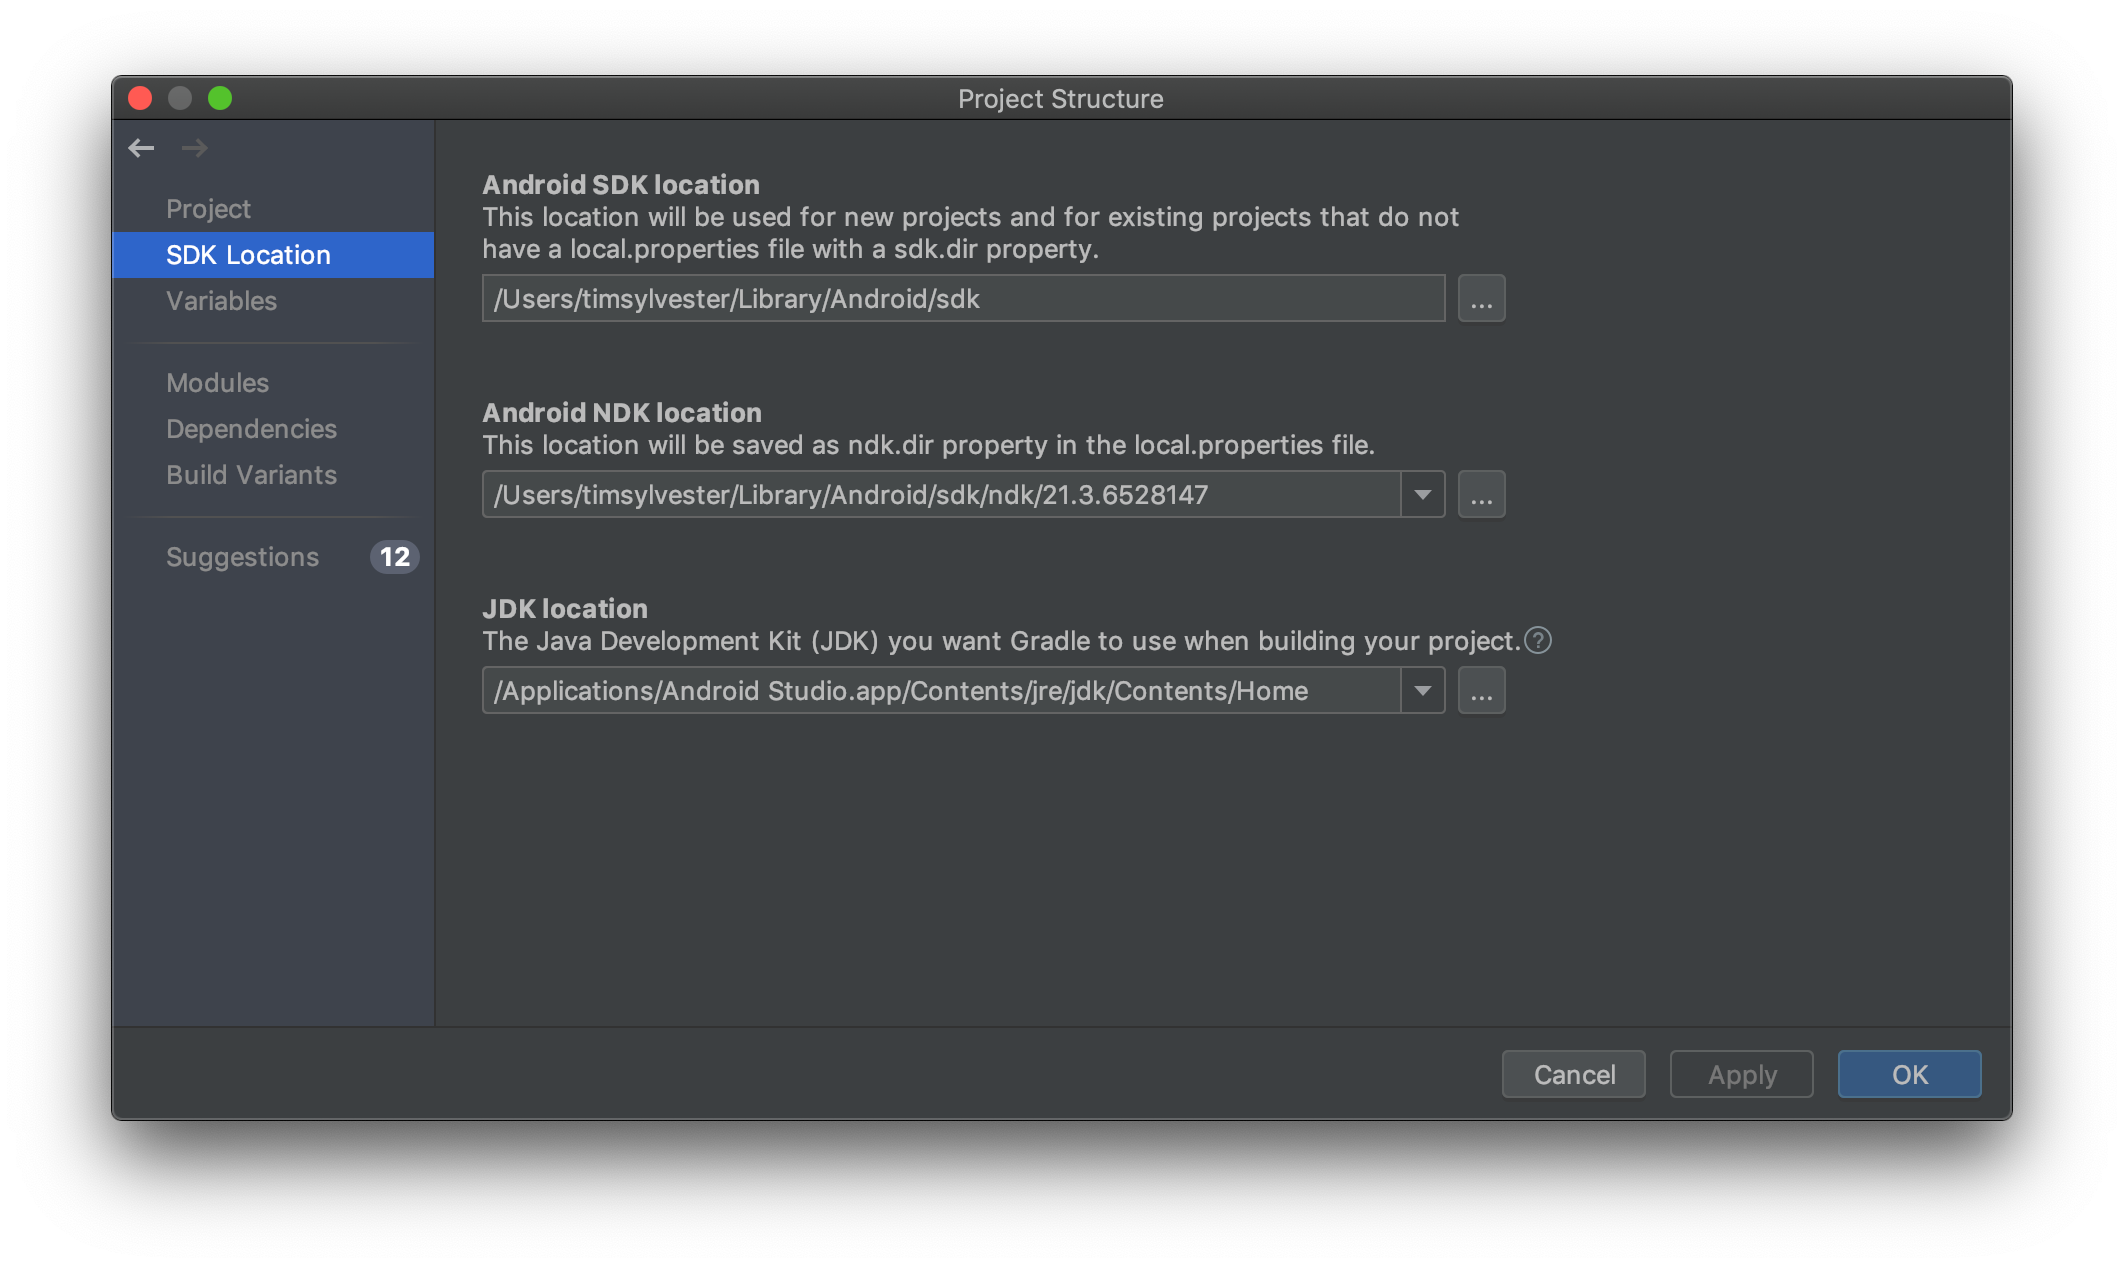
Once the appropriate SDK and NDK are available, open File / Project Structure, then select SDK Location and ensure that the paths are set correctly.
Set Version Compatibility
In order to avoid errors and conflicts, set the source and target compatibility options for the new application to match those of the maply module in the File / Project Structure options dialog.
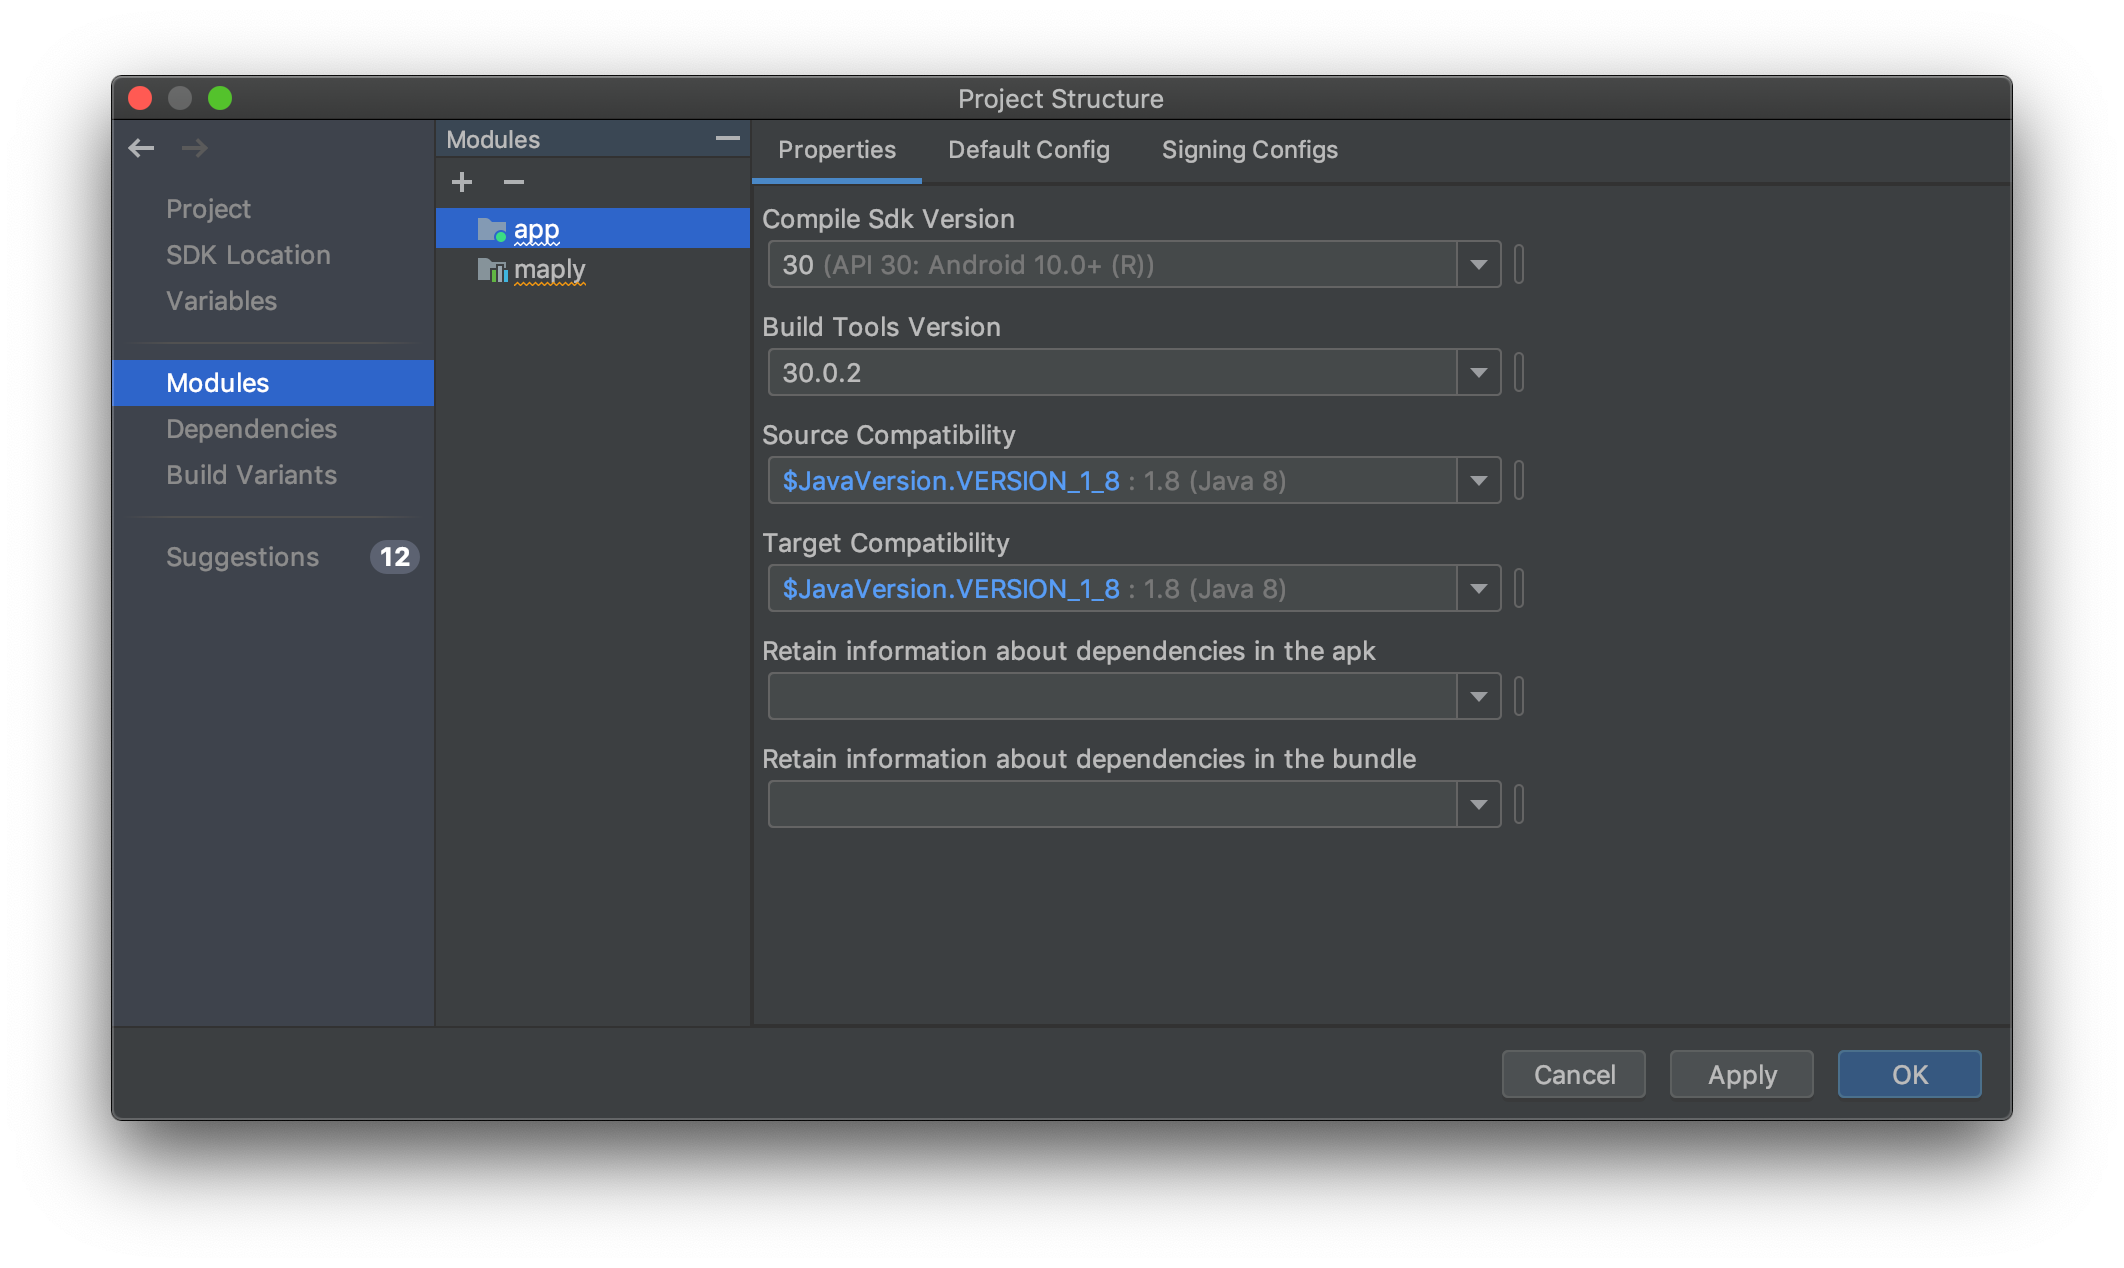
In particular, this has been observed to cause the following exception on application start:
java.lang.NoSuchMethodError: No static method metafactory(...); in class ...LambdaMetafactory; or its super classes ...
Example App
To continue building HelloEarth, go to the Your First Globe or Map page.
Besides the Hello Earth project, there is an example app you can try out called AutoTesterAndroid. This is optional, but it is the quickest way to see something work. We have brief instructions for you to build AutoTesterAndroid.
Tutorial by Nicholas Hallahan, Steve Gifford, Tim Sylvester.