Spheres
One interesting feature of the globe is that you can add 3D extrusions. In particular, we will show you how to add a sphere to your globe.
Insert Spheres
We’ll add another new fragment, HelloSphereFragment.java.
Inside of insertSpheres, we are going to add four spheres, each with a different location and size.
package com.mousebirdconsulting.helloearth;

import com.mousebird.maply.BaseController;
import com.mousebird.maply.ComponentObject;
import com.mousebird.maply.Point2d;
import com.mousebird.maply.Shape;
import com.mousebird.maply.ShapeInfo;
import com.mousebird.maply.ShapeSphere;

import java.util.ArrayList;
import java.util.List;

public class HelloSphereFragment extends HelloGlobeFragment {

    @Override
    protected void controlHasStarted() {
        super.controlHasStarted();

        insertSpheres();
    }

    private void insertSpheres() {
        List<Shape> shapes = new ArrayList<>();

        // Kansas City
        ShapeSphere shape = new ShapeSphere();
        shape.setLoc(Point2d.FromDegrees(-94.58, 39.1));
        shape.setRadius(0.04f); // 1.0 is the radius of the Earth
        shapes.add(shape);

        // Washington D.C.
        shape = new ShapeSphere();
        shape.setLoc(Point2d.FromDegrees(-77.036667, 38.895111));
        shape.setRadius(0.1f);
        shapes.add(shape);

        // McMurdo Station
        shape = new ShapeSphere();
        shape.setLoc(Point2d.FromDegrees(166.666667, -77.85));
        shape.setRadius(0.2f);
        shapes.add(shape);

        // Windhoek
        shape = new ShapeSphere();
        shape.setLoc(Point2d.FromDegrees(17.083611, -22.57));
        shape.setRadius(0.08f);
        shapes.add(shape);

        ShapeInfo shapeInfo = new ShapeInfo();
        shapeInfo.setColor(0.7f, 0.2f, 0.7f, 0.8f); // R,G,B,A - values [0.0 => 1.0]
        shapeInfo.setDrawPriority(1000000);

        ComponentObject co = globeControl.addShapes(shapes, shapeInfo, BaseController.ThreadMode.ThreadAny);

        double latitude = 40 * Math.PI / 180;
        double longitude = -100 * Math.PI / 180;
        double zoom_earth_radius = 1.0;
        globeControl.animatePositionGeo(longitude, latitude, zoom_earth_radius, 1.0);
    }
}
Once again, reference the new fragment:
<?xml version="1.0" encoding="utf-8"?>
<androidx.constraintlayout.widget.ConstraintLayout xmlns:android="http://schemas.android.com/apk/res/android"
    xmlns:app="http://schemas.android.com/apk/res-auto"
    xmlns:tools="http://schemas.android.com/tools"
    android:id="@+id/relativeLayout"
    android:layout_width="match_parent"
    android:layout_height="match_parent"
    tools:context=".MainActivity">

    <fragment
        android:id="@+id/fragment"
        android:name="com.mousebirdconsulting.helloearth.HelloSphereFragment"
        android:layout_width="match_parent"
        android:layout_height="match_parent"
        app:layout_constraintBottom_toTopOf="parent"
        app:layout_constraintEnd_toStartOf="parent"
        app:layout_constraintStart_toStartOf="parent"
        app:layout_constraintTop_toTopOf="parent" />

</androidx.constraintlayout.widget.ConstraintLayout>
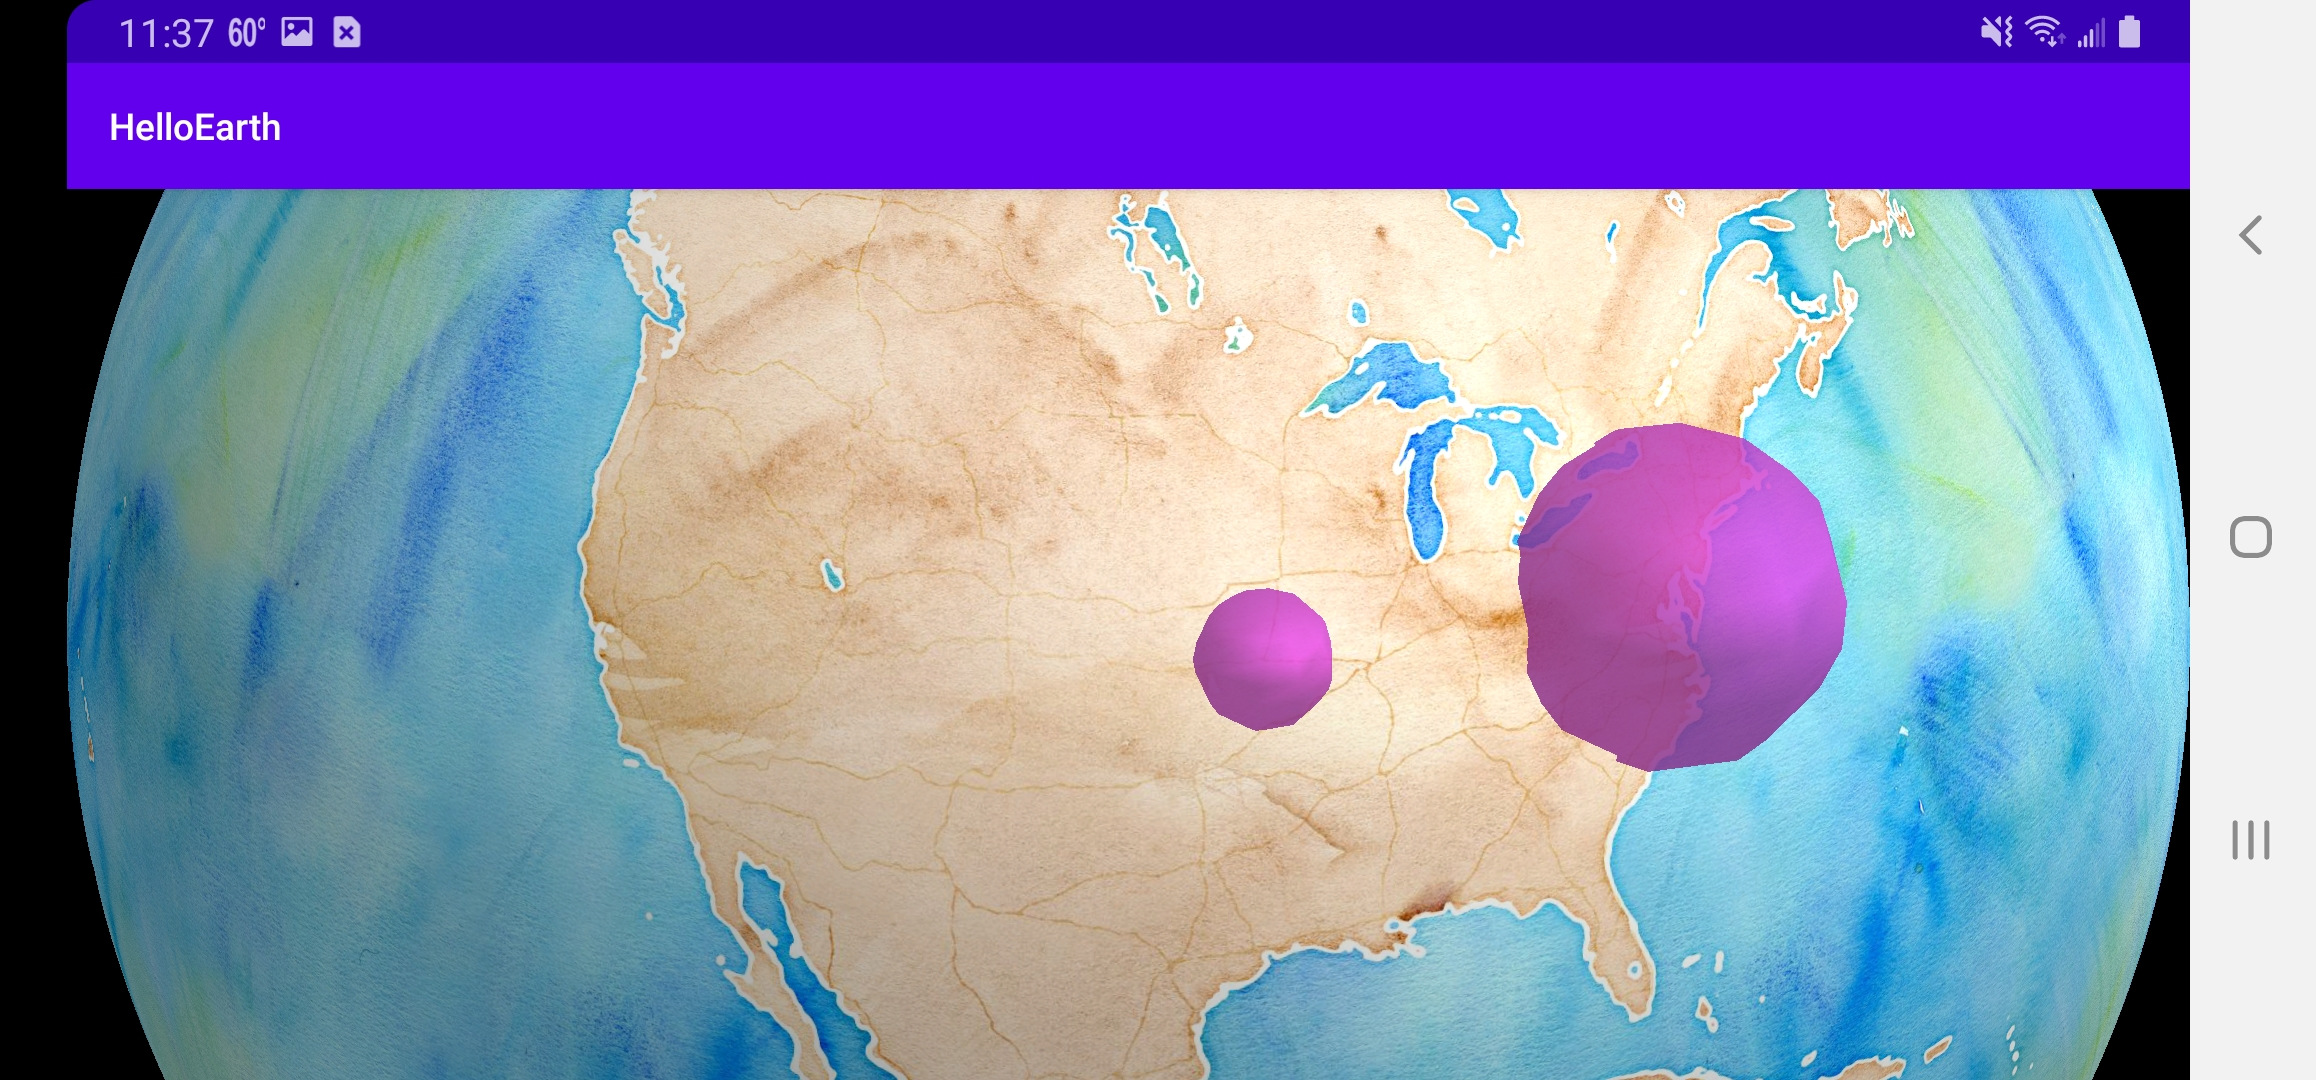
Now you will see that these spheres are placed on the globe and extrude above the surface of the globe.
A few things to make note of…
The radius is a floating point value whose units are Earth radii. That is, 1.0 is the radius of the Earth.
The location of the sphere is determined by setLoc, and this takes a Point2d object. You can easily convert a WGS84 (longitude, latitude) coordinate with the convenice function Point2d.FromDegrees.
The styling of the the shape is done with the ShapeInfo object. This works similarly to MarkerInfo and LabelInfo. The color is set by 4 floating point values [0.0 => 1.0]. These are your red, green, blue, and alpha (transparency) values, respectively.
As before, when you add a sphere to your controller, you are given a ComponentObject from which you can enable, disable, and remove your sphere from the globe.
Tutorial by Nicholas Hallahan, Steve Gifford, Tim Sylvester.