Carto Layer
In this tutorial we’re going to do something fun and complex. We’ll query buildings from a remote spatial database, hosted by CartoDB. We’ll fetch them much like we do remote image maps and we’ll toss them on some satellite imagery.
Let’s look at the data source.
CartoDB
CartoDB is a cloud based spatial database. Built on top of PostgreSQL with a whole lot of front end logic, it’s a nice way to interact with spatial data sets.

We’re going to use one of their examples, New York Primary Land Use Tax Lot Output or PLUTO for short. It contains many, perhaps most, of the buildings in New York with related data.
That’s kind of huge, even just for one borough. We can’t display it all at once and it would be rude to query the whole thing. So we need to break the queries down into tiles.
Quad Paging Layer
To keep things small and fast on a mobile device, we must load only what we’re looking at. Easer to say than to do. We can do that for image maps, as you’ve seen from the examples. The MaplyQuadPagingLayer is how we do it for everything else.
Since we don’t really know what’s in a vector data set, what format it’s in, or how it should look, we need you to fill in the details. The MaplyQuadPagingLayer will handle the tiling logic, but you have to actually fetch and display the data. It’s easier than it sounds.
You make a new class that implements the MaplyPagingDelegate. There’s one important call to go get your data and then a bunch of WhirlyGlobe-Maply methods to display it. The MaplyQuadPagingLayer does the rest.
HelloEarth
You’ll need a sample project for this tutorial. Go back and start with the Hello Earth tutorial and work up to at least Remote Image Layer. We’ll want that satellite imagery for a background.
If you haven’t got one here is a suitable ViewController file to start with (for Objective-C or Swift).
CartoDBLayer
We’ll create a new class called CartoDBLayer. Its job is to talk to CartoDB and display what it gets back. The toolkit will call for every tile the user can see.
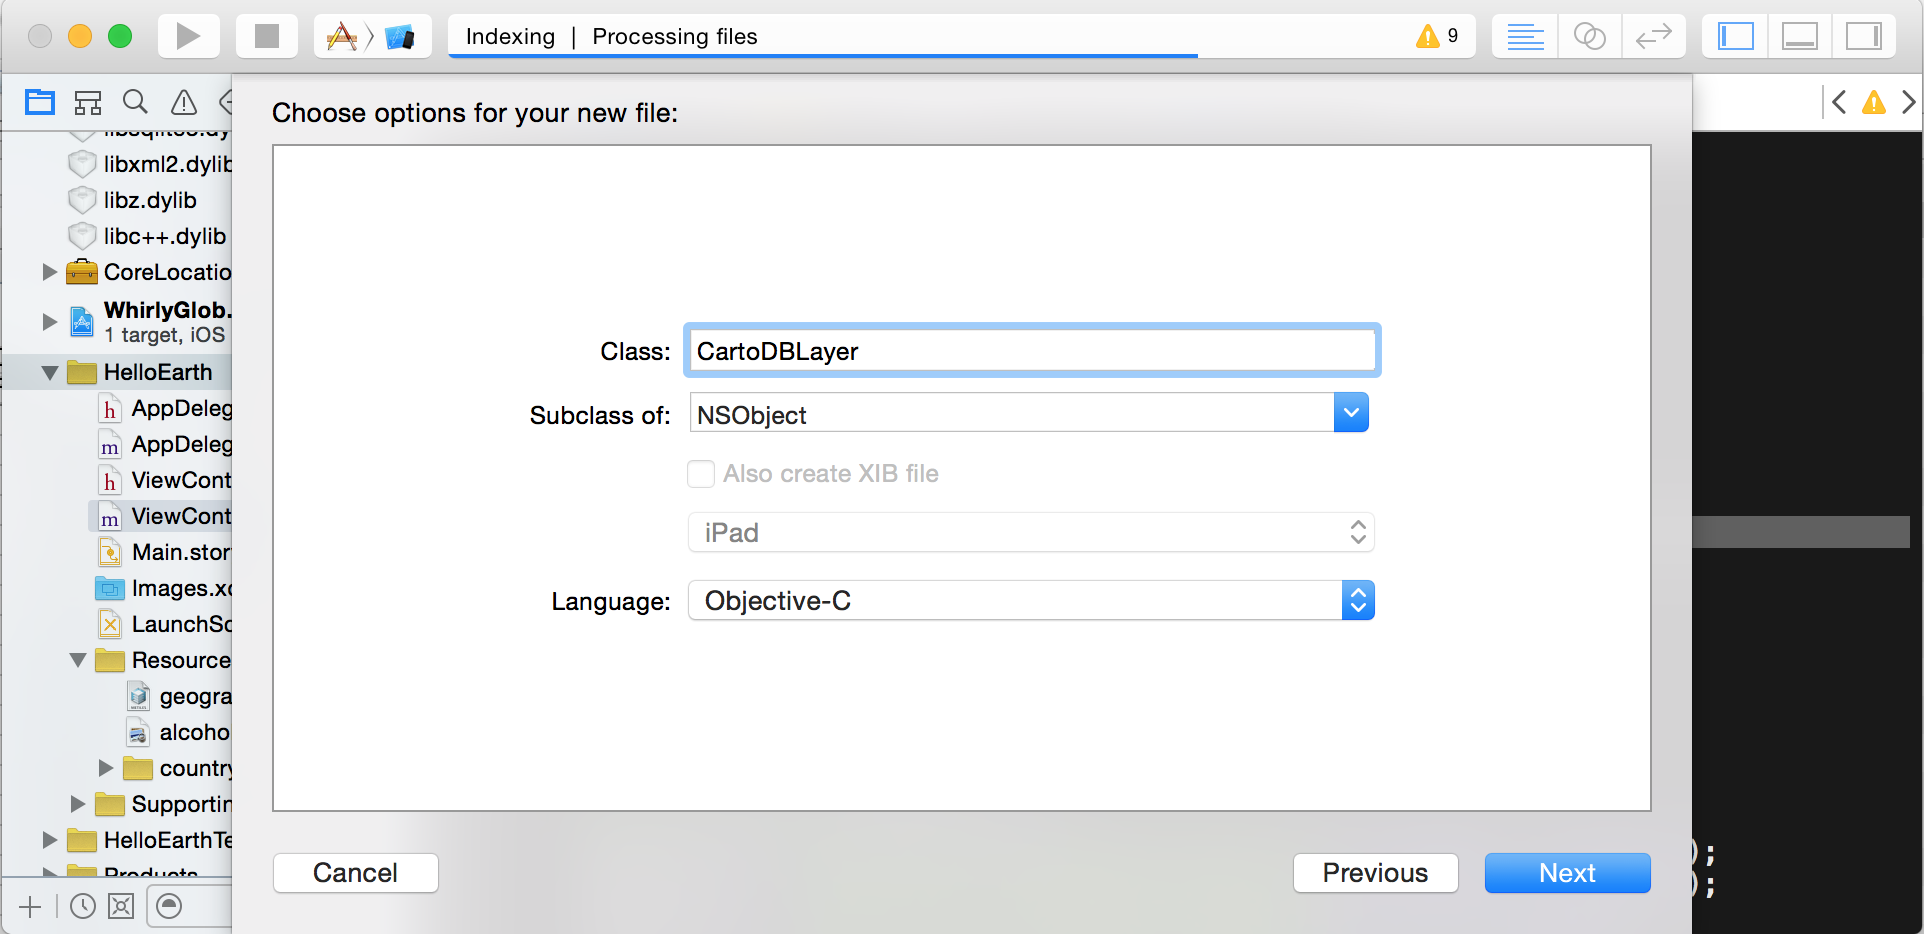
That will create two new files, CartoDBLayer.h and CartoDBLayer.m, or just a simple CartoDBLayer.swift if you prefer.
Here’s what CartoDBLayer header should look like. For Swift, you can see only a small portion of the class:
-
#import <WhirlyGlobeComponent.h> @interface CartoDBLayer : NSObject <MaplyPagingDelegate> { NSString *search; NSOperationQueue *opQueue; } @property (nonatomic,assign) int minZoom,maxZoom; // Create with the search string we'll use - (id)initWithSearch:(NSString *)search; @end -
class CartoDBLayer: NSObject, MaplyPagingDelegate {

   private var _minZoom = Int32(0)
   private var _maxZoom = Int32(0)

   private var search: String
   private var opQueue: OperationQueue?

   // Create with the search string we'll use
   init(search: String) {
      // TODO
   }

   func minZoom() -> Int32 { return _minZoom }
   func maxZoom() -> Int32 { return _maxZoom }

   func setMinZoom(value: Int32) { _minZoom = value }
   func setMaxZoom(value: Int32) { _maxZoom = value }

   func startFetchForTile(tileID: MaplyTileID, forLayer layer: MaplyQuadPagingLayer) {
      // TODO
   }
}
The interesting part here is the MaplyPagingDelegate. We’ll need to implement a few methods for it like so.
- minZoom is the minimum zoom level we’ll support (in Swift, we need getter and setter methods and backing variables)
- maxZoom is the maximum zoom level we’ll support.
- startFetchForTile:forLayer: is the method that does the actual work.
We’ll be using that NSOperationQueue and filling in the init method later. Let’s’ hook this layer into our app.
Adding a Paging Layer
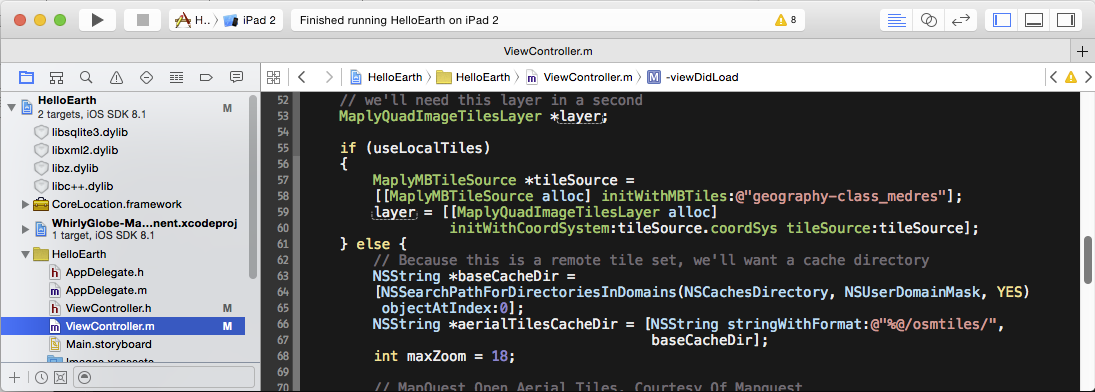
We want to set up a paging layer in the main view controller and start the viewer near our data. Open up your ViewController implementation file.
In Objective-C, at the top, add a new import.
#import "CartoDBLayer.h"Now look for where it says “start up over San Francisco”. We want to start over Manhattan instead, zoomed in.
-
// start up over New York if (globeViewC != nil) { globeViewC.height = 0.0002; [globeViewC animateToPosition:MaplyCoordinateMakeWithDegrees(-73.99,40.75) time:1.0]; } else { globeViewC.height = 0.0002; [mapViewC animateToPosition:MaplyCoordinateMakeWithDegrees(-73.99,40.75) time:1.0]; } -
// start up over New York
if let globeViewC = globeViewC {
    globeViewC.height = 0.0002
    globeViewC.animate(toPosition: MaplyCoordinateMakeWithDegrees(-73.99, 40.75), time: 1.0)
}
else if let mapViewC = mapViewC {
    mapViewC.height = 0.0002
    mapViewC.animate(toPosition: MaplyCoordinateMakeWithDegrees(-73.99, 40.75), time: 1.0)
}
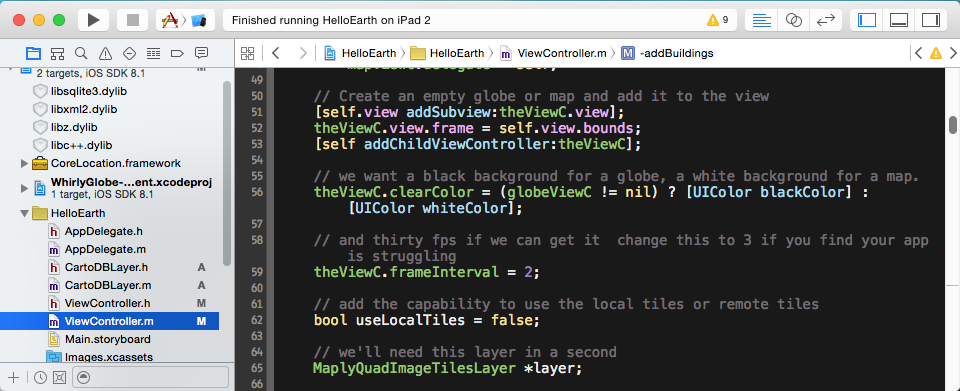
Next, move to the end of your viewDidLoad method and call the following method call, which we’ll fill in shortly.
-
// add the CartoDB layer [self addBuildings]; -
// add the CartoDB layer
addBuildings()
Put the new addBuildings method near the end of your ViewController.
-
- (void)addBuildings { NSString *search = @"SELECT the_geom,address,ownername,numfloors FROM mn_mappluto_13v1 WHERE the_geom && ST_SetSRID(ST_MakeBox2D(ST_Point(%f, %f), ST_Point(%f, %f)), 4326) LIMIT 2000;"; CartoDBLayer *cartoLayer = [[CartoDBLayer alloc] initWithSearch:search]; cartoLayer.minZoom = 15; cartoLayer.maxZoom = 15; MaplySphericalMercator *coordSys = [[MaplySphericalMercator alloc] initWebStandard]; MaplyQuadPagingLayer *quadLayer = [[MaplyQuadPagingLayer alloc] initWithCoordSystem:coordSys delegate:cartoLayer]; [theViewC addLayer:quadLayer]; } -
   private func addBuildings() {
      let search = "SELECT the_geom,address,ownername,numfloors FROM mn_mappluto_13v1 WHERE the_geom && ST_SetSRID(ST_MakeBox2D(ST_Point(%f, %f), ST_Point(%f, %f)), 4326) LIMIT 2000;"

      let cartoLayer = CartoDBLayer(search: search)
      cartoLayer.setMinZoom(15);
      cartoLayer.setMaxZoom(15);
      let coordSys = MaplySphericalMercator()
      if let quadLayer = MaplyQuadPagingLayer(coordSystem: coordSys, delegate: cartoLayer) {
          theViewC?.addLayer(quadLayer)
      }
   }
That SQL query is pretty interesting, but we’ll come back to it later. Here’s how we set things up to display.
- Create the CartoDBLayer with the search string.
- Restrict the zoom levels to just level 15.
- Declare that this data is in spherical mercator, which is normal with web maps.
- Create a MaplyQuadPagingLayer with that coordinate system and cartoLayer delegate.
- Add the MaplyQuadPagingLayer to the globe or map view controller so it starts working.
That’s pretty much it. The rest of the action is in the CartoDBLayer.
CartoDBLayer Implementation
The good parts are in CartodDBLayer class. Yours should be empty, so let’s start with the init method.
-
- (id)initWithSearch:(NSString *)inSearch { self = [super init]; search = inSearch; opQueue = [[NSOperationQueue alloc] init]; return self; } -
   init(search: String) {
      self.search = search
      self.opQueue = NSOperationQueue()

      super.init()
   }
We’re squirreling that search string away for later and we promise to explain it soon. We’ll need that NSOperationQueue later too.
Fetching Data Per Tile
The most important method in the MaplyPagingDelegate is startFetchForTile. This is how the toolkit tells us to go get our data for a given tile and display it. Let’s take a look.
-
- (void)startFetchForTile:(MaplyTileID)tileID forLayer:(MaplyQuadPagingLayer *)layer { // bounding box for tile MaplyBoundingBox bbox; [layer geoBoundsforTile:tileID ll:&bbox.ll ur:&bbox.ur]; NSURLRequest *urlReq = [self constructRequest:bbox]; NSURLSession *session = [NSURLSession sessionWithConfiguration: [NSURLSessionConfiguration defaultSessionConfiguration]]; // kick off the query asychronously [[session dataTaskWithRequest:urlReq completionHandler: ^(NSData * _Nullable data, NSURLResponse * _Nullable response, NSError * _Nullable connectionError) { // parse the resulting GeoJSON MaplyVectorObject *vecObj = [MaplyVectorObject VectorObjectFromGeoJSON:data]; if (vecObj) { // display a transparent filled polygon MaplyComponentObject *filledObj = [layer.viewC addVectors:@[vecObj] desc:@{kMaplyColor: [UIColor colorWithRed:0.25 green:0.0 blue:0.0 alpha:0.25], kMaplyFilled: @(YES), kMaplyEnable: @(NO) } mode:MaplyThreadCurrent]; // display a line around the lot MaplyComponentObject *outlineObj = [layer.viewC addVectors:@[vecObj] desc:@{kMaplyColor: [UIColor redColor], kMaplyFilled: @(NO), kMaplyEnable: @(NO) } mode:MaplyThreadCurrent]; // keep track of it in the layer [layer addData:@[filledObj,outlineObj] forTile:tileID]; } // let the layer know the tile is done [layer tileDidLoad:tileID]; }] resume]; } -
func startFetchForTile(tileID: MaplyTileID, forLayer layer: MaplyQuadPagingLayer) {
   // bounding box for tile
   let bbox = layer.boundsForTile(tileID)
   let urlReq = constructRequest(bbox)

   let session = NSURLSession(configuration: NSURLSessionConfiguration.defaultSessionConfiguration())

   session.dataTaskWithRequest(urlReq) { (data, response, error) in
      // parse the resulting GeoJSON
      if let data = data, vecObj = MaplyVectorObject(fromGeoJSON: data) {
         // display a transparent filled polygon
         let filledObj = layer.viewC!.addVectors([vecObj],
            desc: [
               kMaplyColor: UIColor(red: 0.25, green: 0.0, blue: 0.0, alpha: 0.25),
               kMaplyFilled: true,
               kMaplyEnable: false
            ],
            mode: .Current)

         // display a line around the lot
         let outlineObj = layer.viewC!.addVectors([vecObj],
            desc: [
               kMaplyColor: UIColor.redColor(),
               kMaplyFilled: false,
               kMaplyEnable: false
            ],
            mode: .Current)

         // keep track of it in the layer
         layer.addData([filledObj!, outlineObj!], forTile: tileID)

         // let the layer know the tile is done
         layer.tileDidLoad(tileID)
      }
   }.resume()
}
We’re only going to get these requests for level 15, since we set our minZoom and maxZoom to 15. So you can avoid thinking about levels. That means a given tile request will come in and its our job to get the data for just that tile.
startFetchForTile Details
First, we ask the MaplyQuadPagingLayer what the bounds are for the tile. We’ll need those to construct the query, which we’ll talk about shortly.
Once we’ve got the query from the constructRequest method, we kick off an asychronous call to NSURLConnection to go get the data. We’re expecting GeoJSON back. The connection will call our little code block when it finishes and we’ll be on a thread associated with the NSOperationQueue we created earlier.
Mobile apps are heavily threaded and WhirlyGlobe-Maply is built for it. We can add and remove display data on any thread we like. Sure enough, in that little execution block we turn the data into a MaplyVectorObject by parsing the GeoJSON and we display it in two different ways: (1) as a filled transparent polygon and (2) as a solid outline.
The display version is now created, but we’re not done yet. We still need to tell the MaplyQuadPagingLayer what we did.
That’s what the addData: call is for. The MaplyQuadPagingLayer now knows about those two objects and can delete them when they’re no longer needed.
Lastly, we tell the layer that the tileDidLoad: and we’re done.
Building CartoDB Requests
Let’s circle back to the CartoDB Request. We have the bounding box for a tile and we need the NSURLRequest to go get the data. Add this to your CartoDBLayer class:
-
- (NSURLRequest *)constructRequest:(MaplyBoundingBox)bbox { double toDeg = 180/M_PI; NSString *query = [NSString stringWithFormat:search,bbox.ll.x*toDeg,bbox.ll.y*toDeg,bbox.ur.x*toDeg,bbox.ur.y*toDeg]; NSString *encodeQuery = [query stringByAddingPercentEncodingWithAllowedCharacters:[NSCharacterSet URLQueryAllowedCharacterSet]]; encodeQuery = [encodeQuery stringByReplacingOccurrencesOfString:@"&" withString:@"%26"]; NSString *fullUrl = [NSString stringWithFormat:@"https://pluto.cartodb.com/api/v2/sql?format=GeoJSON&q=%@",encodeQuery]; NSURLRequest *urlReq = [NSURLRequest requestWithURL:[NSURL URLWithString:fullUrl]]; return urlReq; } -
func constructRequest(bbox: MaplyBoundingBox) -> NSURLRequest {
   let toDeg = Float(180.0/M_PI)
   let query = NSString(format: search, bbox.ll.x * toDeg, bbox.ll.y * toDeg,bbox.ur.x * toDeg, bbox.ur.y * toDeg)
   var encodeQuery = query.stringByAddingPercentEncodingWithAllowedCharacters(NSCharacterSet.URLQueryAllowedCharacterSet())
   let range = encodeQuery!.startIndex..<encodeQuery!.endIndex
   encodeQuery = encodeQuery!.stringByReplacingOccurrencesOfString("&", withString: "%26", options: [], range: range)
   let fullUrl = NSString(format: "https://pluto.cartodb.com/api/v2/sql?format=GeoJSON&q=%@", encodeQuery!) as String
   return NSURLRequest(URL: NSURL(string: fullUrl)!)
}
This is filling in the bounding box from the tile and constructing a real search string. It’s appending it onto the URL for the CartoDB site and dealing with the encoding issues for characters. Then it returns a usable NSURLRequest, which we need to talk to the server.
Let’s look at that search string.
CartoDB SQL
You might recall we fed in a search string that looked like this.
-
NSString *search = @"SELECT the_geom,address,ownername,numfloors FROM mn_mappluto_13v1 WHERE the_geom && ST_SetSRID(ST_MakeBox2D(ST_Point(%f, %f), ST_Point(%f, %f)), 4326) LIMIT 2000;"; -
let search = "SELECT the_geom,address,ownername,numfloors FROM mn_mappluto_13v1 WHERE the_geom && ST_SetSRID(ST_MakeBox2D(ST_Point(%f, %f), ST_Point(%f, %f)), 4326) LIMIT 2000;"
Okay, this is SQL so it is as complex as it looks. I recommend perusing the CartoDB docs for the full explanation of what’s going on here. But to put it simply.
- We’re asking for data from the Manhattan PLUTO table.
- We want the geometry (polygons), the address, owner, and number of floors.
- But only within the given bounding box.
- Oh, and keep it down to 2000 objects max.
We fill in the bounding box in the constructRequest method and pass back a functional NSURLRequest. From that we can fetch the data.
Results
Whew! That was a lot of code for a tutorial. Let’s run the app and see what happens.
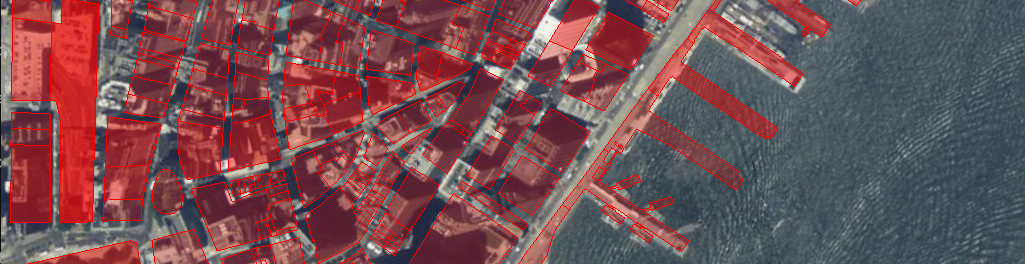
If you don’t see that or it didn’t compile, take a look at the code snippets. Or you can just look at the complete files.
- Objective-C
- ViewController.m Your main view controller.
- CartoDBLayer.h CartoDBLayer header.
- CartoDBLayer.m CartoDBLayer implementation.
- Swift
- ViewController.swift Your main view controller.
- CartoDBLayer.swift CartoDBLayer class.