DigitalGlobe Maps API
Tutorial by Ranen Ghosh
DigitalGlobe provides Maps API image layers via Mapbox, including satellite imagery layers and general reference basemap layers. Integrating these layers into the map toolkit is almost effortless.
You’ll need to have done the globe or map tutorials, either is fine. Open your HelloEarth project and get ready.
If you haven’t got one here is a suitable ViewController (for Objective-C or Swift) file to start with. This version handles both a globe and a map and makes a nice starting point.
Maps API imagery and basemaps
Maps API provides several beautiful and high-resolution map layers:
| Name | Map ID | Description |
|---|---|---|
| Recent Imagery | nal0g75k | A “curated snapshot” of recent satellite imagery. |
| Street Map | nako6329 | An enhanced road basemap based. |
| Terrain Map | nako1fhg | Terrain shading and contours with roads. |
| Transparent Vectors | nakolk5j | OpenStreetMap with a transparent background. |
| Recent Imagery / Streets | nal0mpda | Map combining Recent Imagery with streets |
The Map ID is prefixed with digitalglobe and is used to request the desired map from the map server.
Basic Map or Globe Setup
In this tutorial we’ll setup the basic map or globe, and then add the desired DigitalGlobe map layer.
If you worked through the globe or the map example, you’ll need to add this little bit of code to your viewDidLoad method. This will make the examples work with either globe or map. If you’re using the ViewController file from above, you don’t need it.
-
// this logic makes it work for either globe or map WhirlyGlobeViewController *globeViewC = nil; MaplyViewController *mapViewC = nil; if ([theViewC isKindOfClass:[WhirlyGlobeViewController class]]) globeViewC = (WhirlyGlobeViewController *)theViewC; else mapViewC = (MaplyViewController *)theViewC; -
let globeViewC = theViewC as? WhirlyGlobeViewController
let mapViewC = theViewC as? MaplyViewController
Also, add this additional setup for the map / globe to the end of the viewDidLoad method:
-
// we want a black background for a globe, a white background for a map. theViewC.clearColor = (globeViewC != nil) ? [UIColor blackColor] : [UIColor whiteColor]; // and thirty fps if we can get it change this to 3 if you find your app is struggling theViewC.frameInterval = 2; // start up over San Francisco if (globeViewC != nil) { globeViewC.height = 0.8; [globeViewC animateToPosition:MaplyCoordinateMakeWithDegrees(-122.4192,37.7793) time:1.0]; } else { mapViewC.height = 1.0; [mapViewC animateToPosition:MaplyCoordinateMakeWithDegrees(-122.4192,37.7793) time:1.0]; } -
// we want a black background for a globe, a white background for a map. theViewC!.clearColor = (globeViewC != nil) ? UIColor.black : UIColor.white // and thirty fps if we can get it change this to 3 if you find your app is struggling theViewC!.frameInterval = 2 // start up over San Francisco if let globeViewC = globeViewC { globeViewC.height = 0.8 globeViewC.animate(toPosition: MaplyCoordinateMakeWithDegrees(-122.4192,37.7793), time: 1.0) } else if let mapViewC = mapViewC { mapViewC.height = 1.0 mapViewC.animate(toPosition: MaplyCoordinateMakeWithDegrees(-122.4192,37.7793), time: 1.0) }
Adding Maps API layers to WhirlyGlobe
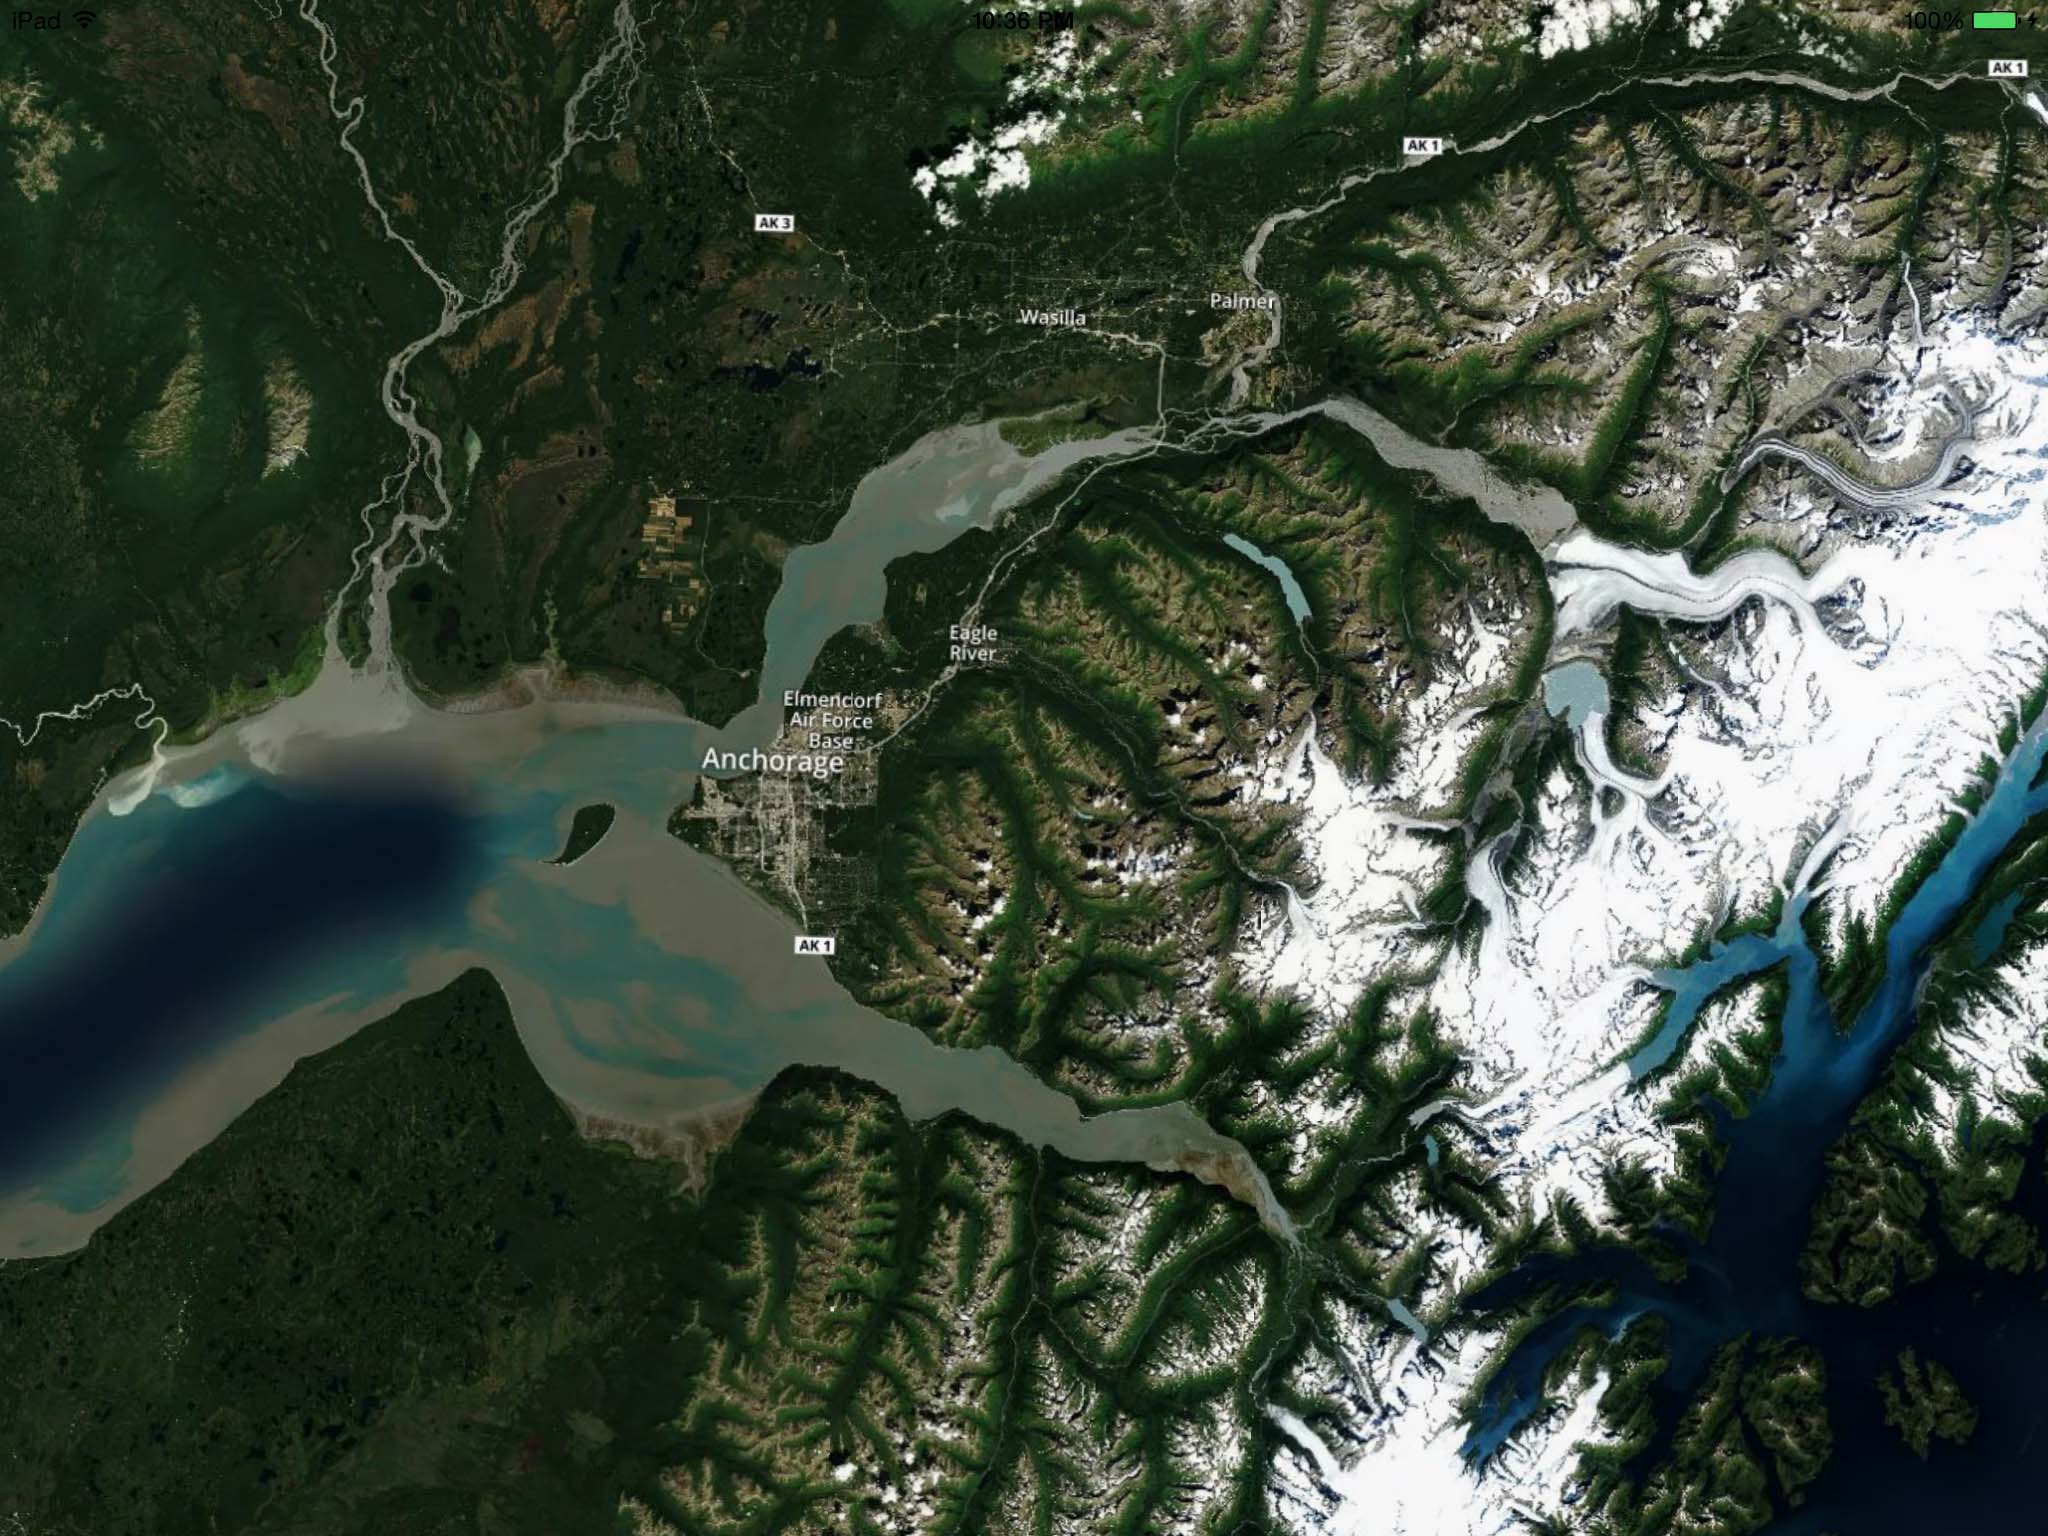
Here is where we add the DigitalGlobe map layer to the map / globe. In this example we’ll use Recent Imagery with Streets. We create a MaplyRemoteTileSource, feed it to a MaplyQuadImageTilesLayer, and set a few attributes, and that’s it.
-
NSString *mapID = @"digitalglobe.nal0mpda"; // Map ID for Recent Imagery with Streets NSString *accessToken = @"YOUR ACCESS TOKEN GOES HERE"; NSString *baseURL = [NSString stringWithFormat:@"https://api.tiles.mapbox.com/v4/%@/{z}/{x}/{y}.png?access_token=%@", mapID, accessToken]; MaplyRemoteTileSource *tileSource = [[MaplyRemoteTileSource alloc] initWithBaseURL:baseURL ext:nil minZoom:1 maxZoom:22]; NSString *baseCacheDir = NSSearchPathForDirectoriesInDomains(NSCachesDirectory, NSUserDomainMask, YES)[0]; tileSource.cacheDir = [NSString stringWithFormat:@"%@/%@", baseCacheDir, mapID]; imageLayer = [[MaplyQuadImageTilesLayer alloc] initWithCoordSystem:tileSource.coordSys tileSource:tileSource]; imageLayer.drawPriority = kMaplyImageLayerDrawPriorityDefault + 100; imageLayer.importanceScale = 0.25; [theViewC addLayer:imageLayer]; -
let mapID = "digitalglobe.nal0mpda" // Map ID for Recent Imagery with Streets
let accessToken = "YOUR ACCESS TOKEN GOES HERE"

let baseURL = "https://api.tiles.mapbox.com/v4/\(mapID)/{z}/{x}/{y}.png?access_token=\(accessToken)"
let tileSource = MaplyRemoteTileSource(baseURL: baseURL, ext: nil, minZoom: 1, maxZoom: 22)
let baseCacheDir = NSSearchPathForDirectoriesInDomains(.cachesDirectory, .userDomainMask, true)[0] as String
tileSource!.cacheDir = "\(baseCacheDir)/\(mapID)/"

imageLayer = MaplyQuadImageTilesLayer(coordSystem: tileSource!.coordSys, tileSource: tileSource!)
imageLayer.drawPriority = kMaplyImageLayerDrawPriorityDefault + 100
imageLayer.importanceScale = 0.25
theViewC!.add(imageLayer)
This is what the Recent Imagery with Streets layer looks like over Anchorage, Alaska.
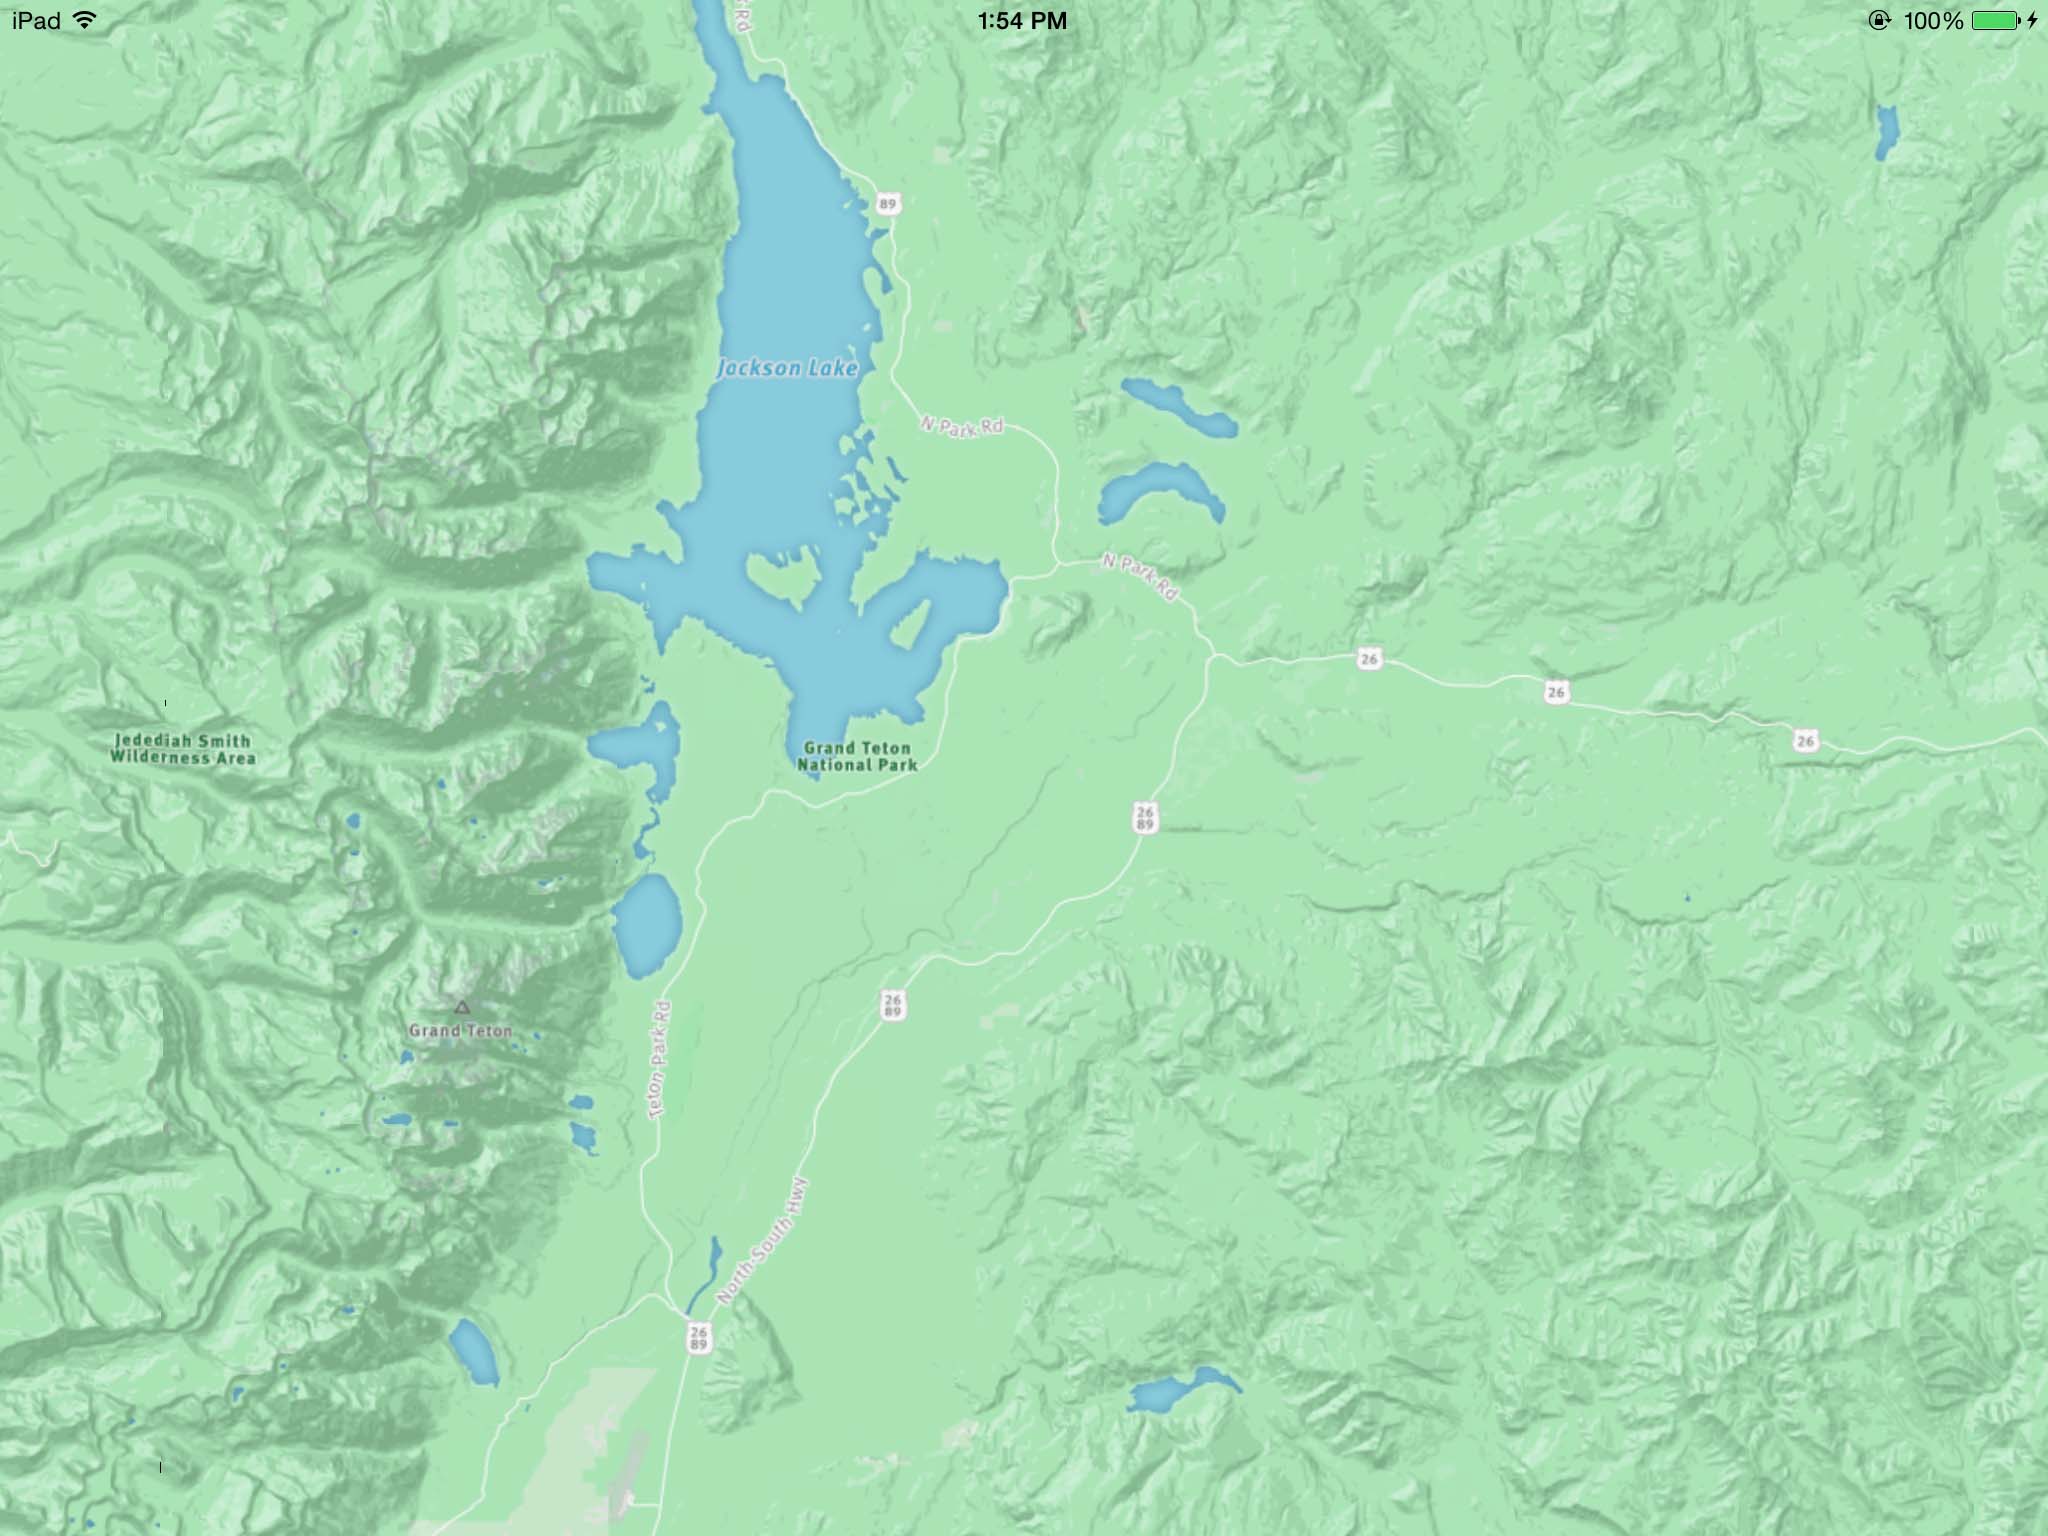
To view a different layer, simply substitute the desired Map ID. Here we’ll try the Terrain Map layer.
-
NSString *mapID = @"digitalglobe.nako1fhg"; -
let mapID = "digitalglobe.nako1fhg"
Here’s the terrain over Grand Teton National Park in Wyoming.
The Transparent Vectors Layer
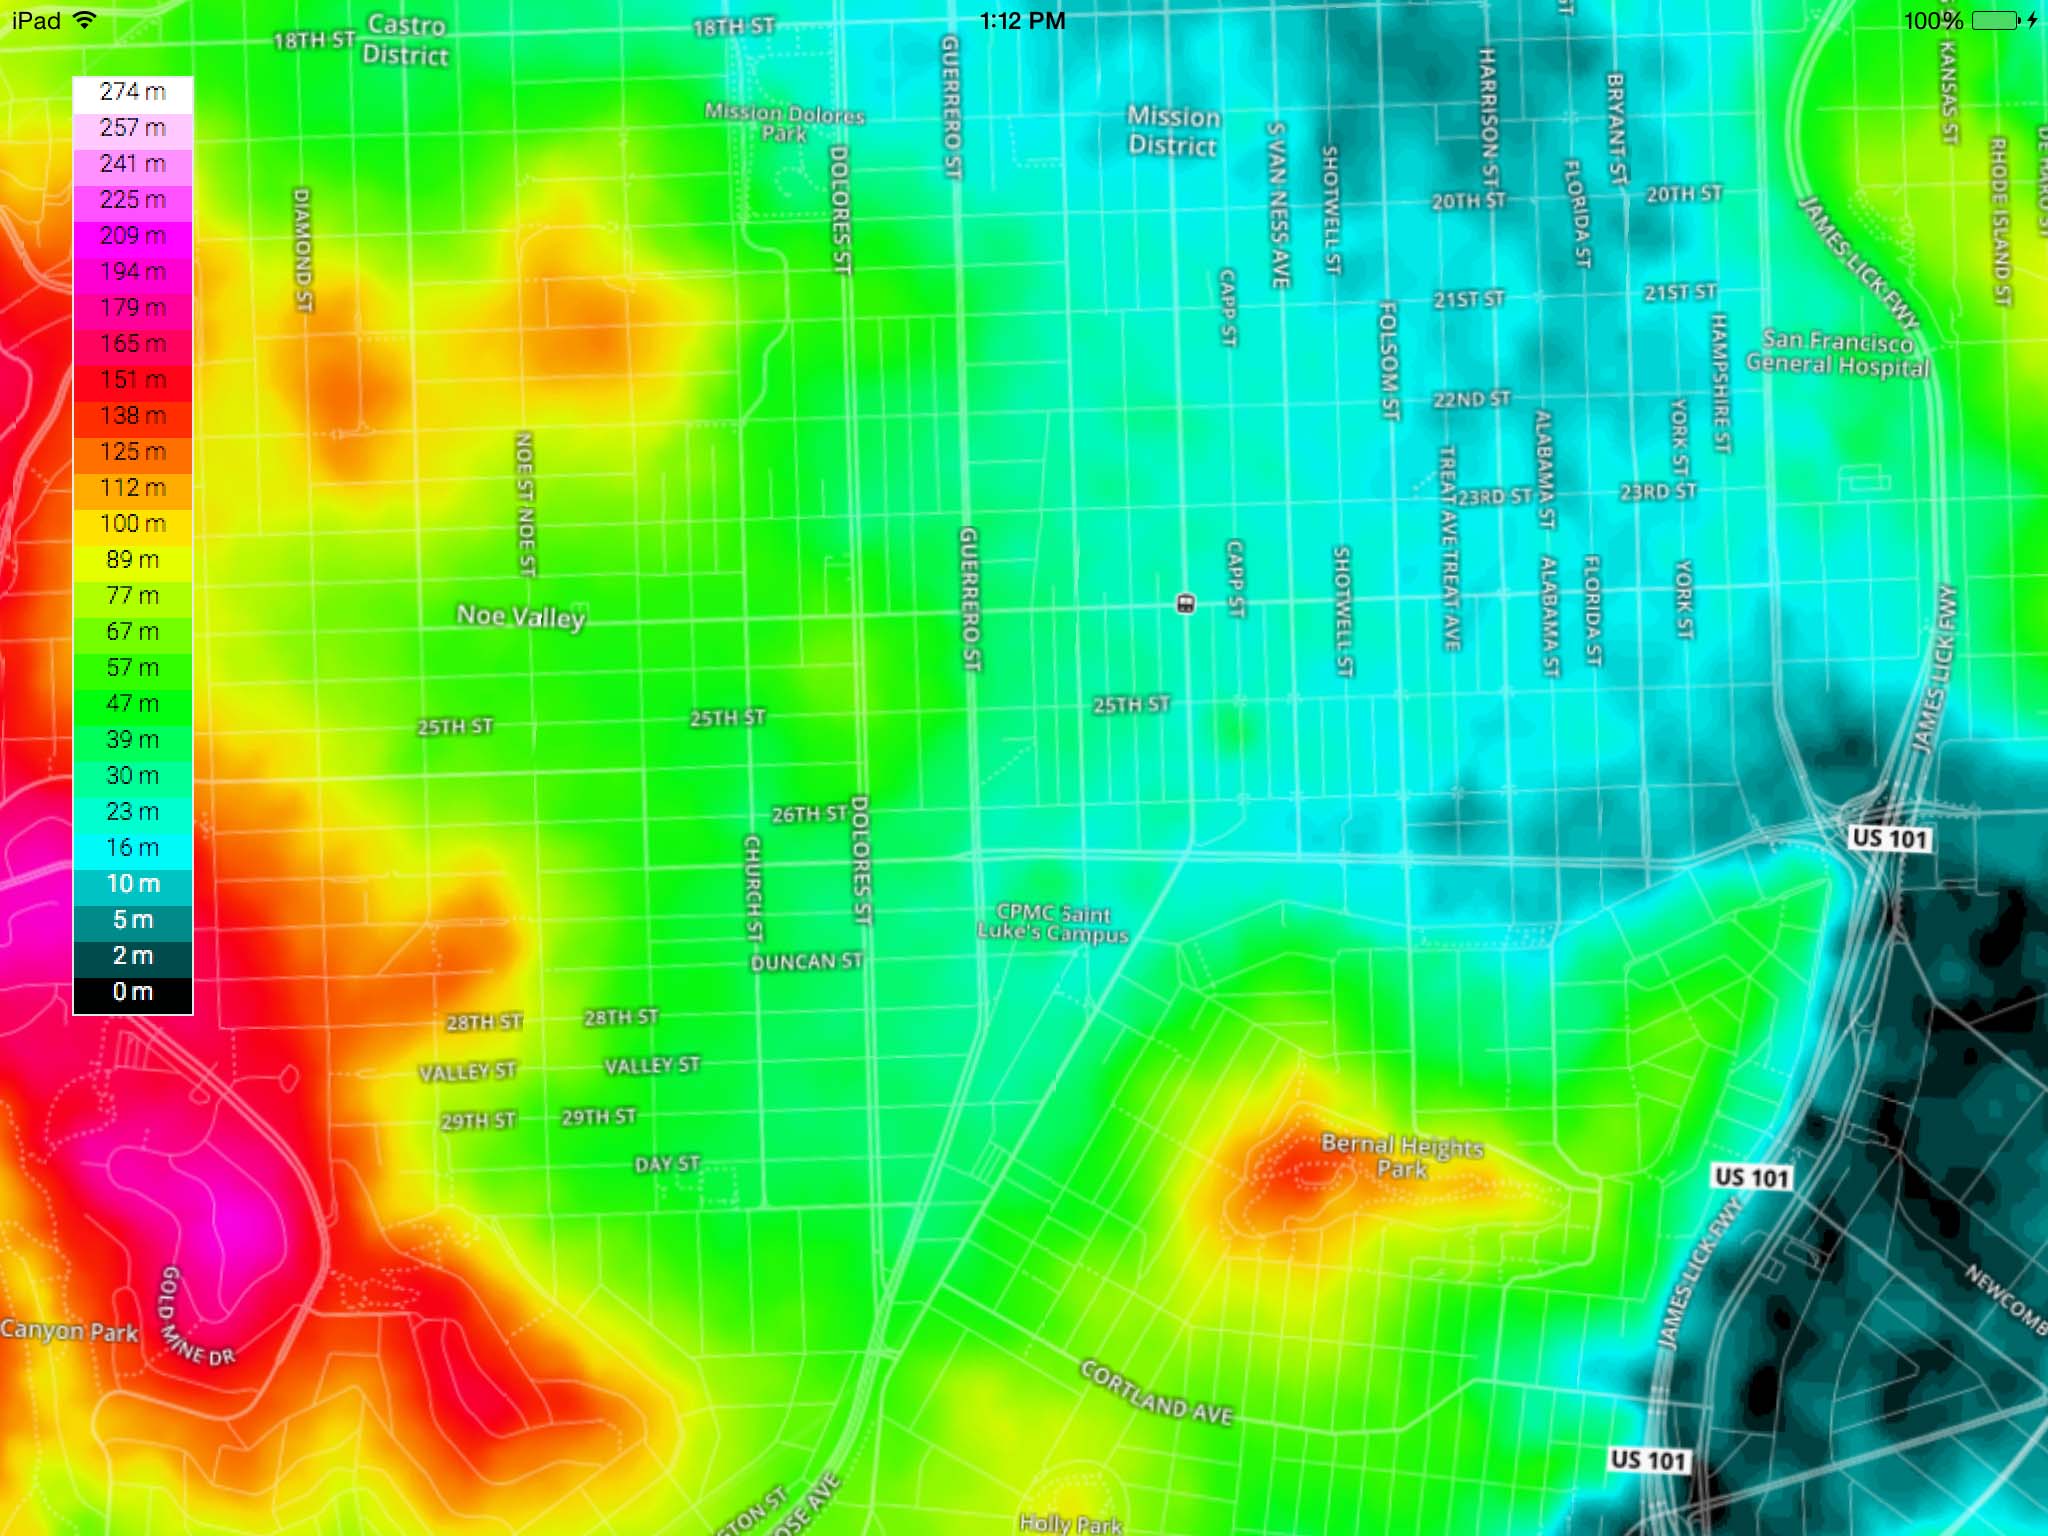
As a final example, we’ll demonstrate a use of DigitalGlobe’s Transparent Vectors layer by overlaying it onto a color relief topographic map. Download the topographic map image and the legend image, and add them to your project.
Change the Map ID:
-
NSString *mapID = @"digitalglobe.nakolk5j"; -
let mapID = "digitalglobe.nakolk5j"
Now add the topo map and the legend.
-
MaplySticker *sticker = [[MaplySticker alloc] init]; sticker.ll = MaplyCoordinateMakeWithDegrees(-122.52, 37.7); sticker.ur = MaplyCoordinateMakeWithDegrees(-122.35, 37.82); sticker.image = [UIImage imageNamed:@"sf_dem_color_relief"]; [theViewC addStickers:@[sticker] desc:@{kMaplyDrawPriority: @(kMaplyImageLayerDrawPriorityDefault)}]; UIImage *legendImage = [UIImage imageNamed:@"sf_dem_legend"]; UIImageView *legend = [[UIImageView alloc] initWithImage:legendImage]; legend.frame = CGRectMake(20, 20, legendImage.size.width, legendImage.size.height); [theViewC.view addSubview:legend]; -
let sticker = MaplySticker()
sticker.ll = MaplyCoordinateMakeWithDegrees(-122.52, 37.7)
sticker.ur = MaplyCoordinateMakeWithDegrees(-122.35, 37.82)
sticker.image = UIImage(named:"sf_dem_color_relief")
theViewC!.addStickers([sticker], desc: [kMaplyDrawPriority : Int(kMaplyImageLayerDrawPriorityDefault)])

let legendImage = UIImage(named:"sf_dem_legend")
let legend = UIImageView(image: legendImage)
legend.frame = CGRectMake(20, 20, legendImage!.size.width, legendImage!.size.height)
theViewC!.view.addSubview(legend)
Finally, lower the view height to zoom in on San Francisco at start-up.
-
if (globeViewC != nil) { globeViewC.height = 0.002; [globeViewC animateToPosition:MaplyCoordinateMakeWithDegrees(-122.4192,37.7793) time:1.0]; } else { mapViewC.height = 0.002; [mapViewC animateToPosition:MaplyCoordinateMakeWithDegrees(-122.4192,37.7793) time:1.0]; } -
if let globeViewC = globeViewC {
    globeViewC.height = 0.002
    globeViewC.animate(toPosition: MaplyCoordinateMakeWithDegrees(-122.4192,37.7793), time: 1.0)
}
else if let mapViewC = mapViewC {
    mapViewC.height = 0.002
    mapViewC.animate(toPosition: MaplyCoordinateMakeWithDegrees(-122.4192,37.7793), time: 1.0)
}
The result shows the ground elevation along every street in San Francisco.