Remote Image Layer
The Geography Class example only has a few levels of detail. We can’t zoom in very close and if we could it would take up way too much space on the device. Thus, we need a way to look at tiled image maps sitting on a server.
Let’s add a remote tile source, and take a closer look at the Earth. We’ll use the Stamen Terrain tile set. If you end up wanting to use these tiles in an app that you distribute, check out the requirements. (Full attribution: Map tiles by Stamen Design, under CC BY 3.0. Data by OpenStreetMap, under ODbL.)
You’ll need to have done the globe or map tutorials, either is fine. Open your HelloEarth project and get ready.
If you haven’t got one here is a suitable ViewController for Swift file to start with. This version handles both a globe and a map and makes a nice starting point.
The Basics
If you’ve done the Local Image Layer tutorial, you’ve got the basics. The only difference is we’re going to get the image tiles from a remote server. Weirdly enough, this is simpler than a local image layer.
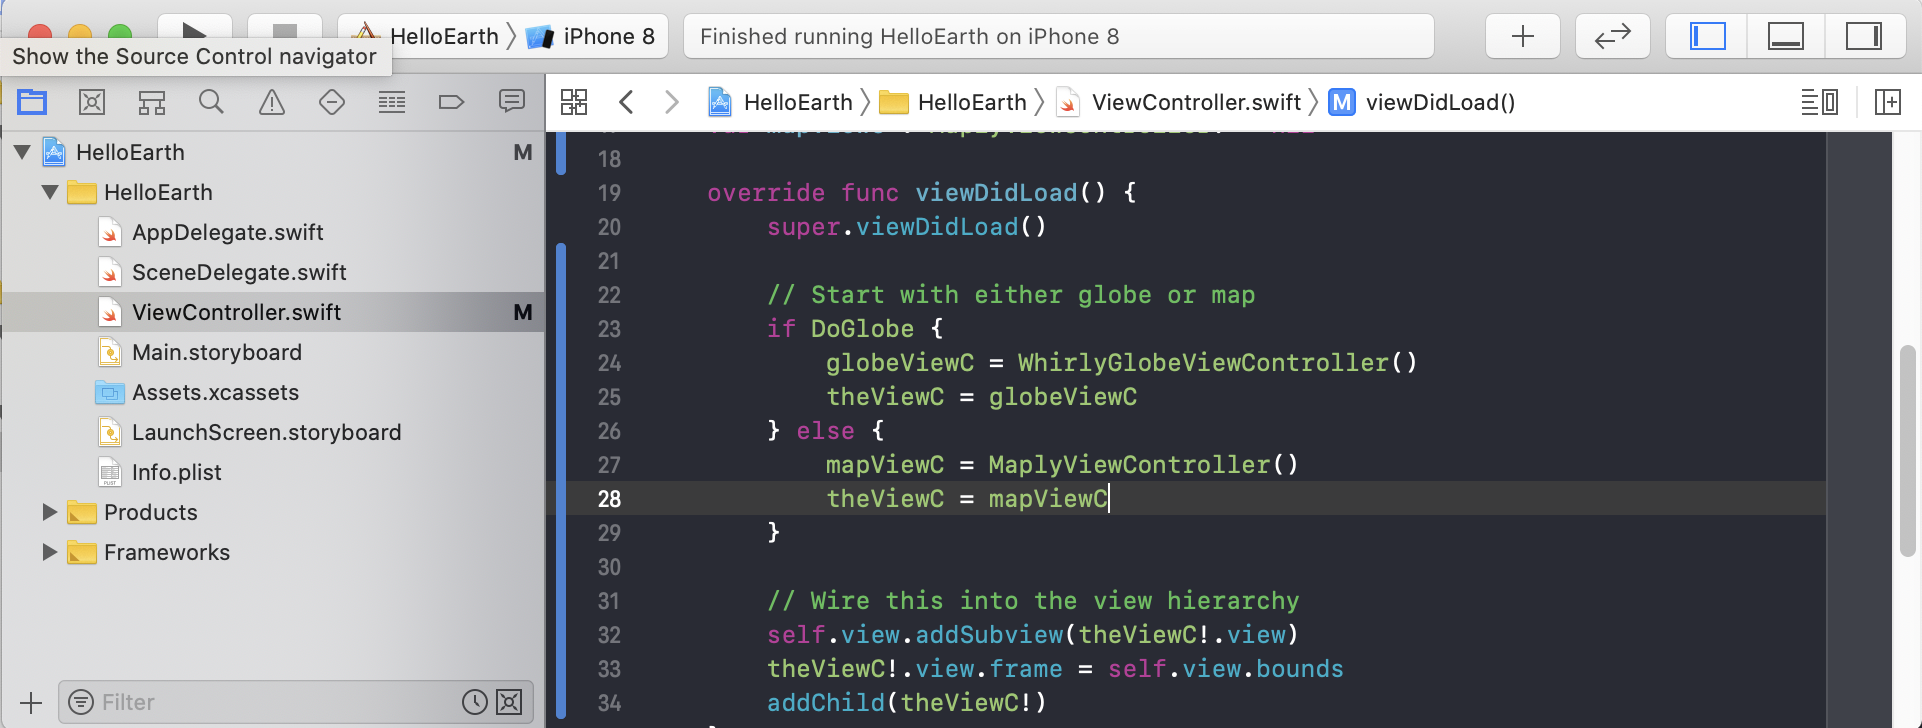
If you worked through the globe or the map example, you’ll need to add this little bit of code to your viewDidLoad method. This will make the examples work with either globe or map. If you’re using the ViewController file from above, you don’t need it.
-
let globeViewC = theViewC as? WhirlyGlobeViewController let mapViewC = theViewC as? MaplyViewController -
  // this logic makes it work for either globe or map
  WhirlyGlobeViewController *globeViewC = nil;
  MaplyViewController *mapViewC = nil;
  if ([theViewC isKindOfClass:[WhirlyGlobeViewController class]])
      globeViewC = (WhirlyGlobeViewController *)theViewC;
  else
      mapViewC = (MaplyViewController *)theViewC;
Now, add this declaration to your ViewController.
-
var imageLoader : MaplyQuadImageLoader? = nil -
    // These go well in your @implementation block
    MaplyQuadImageLoader *imageLoader;
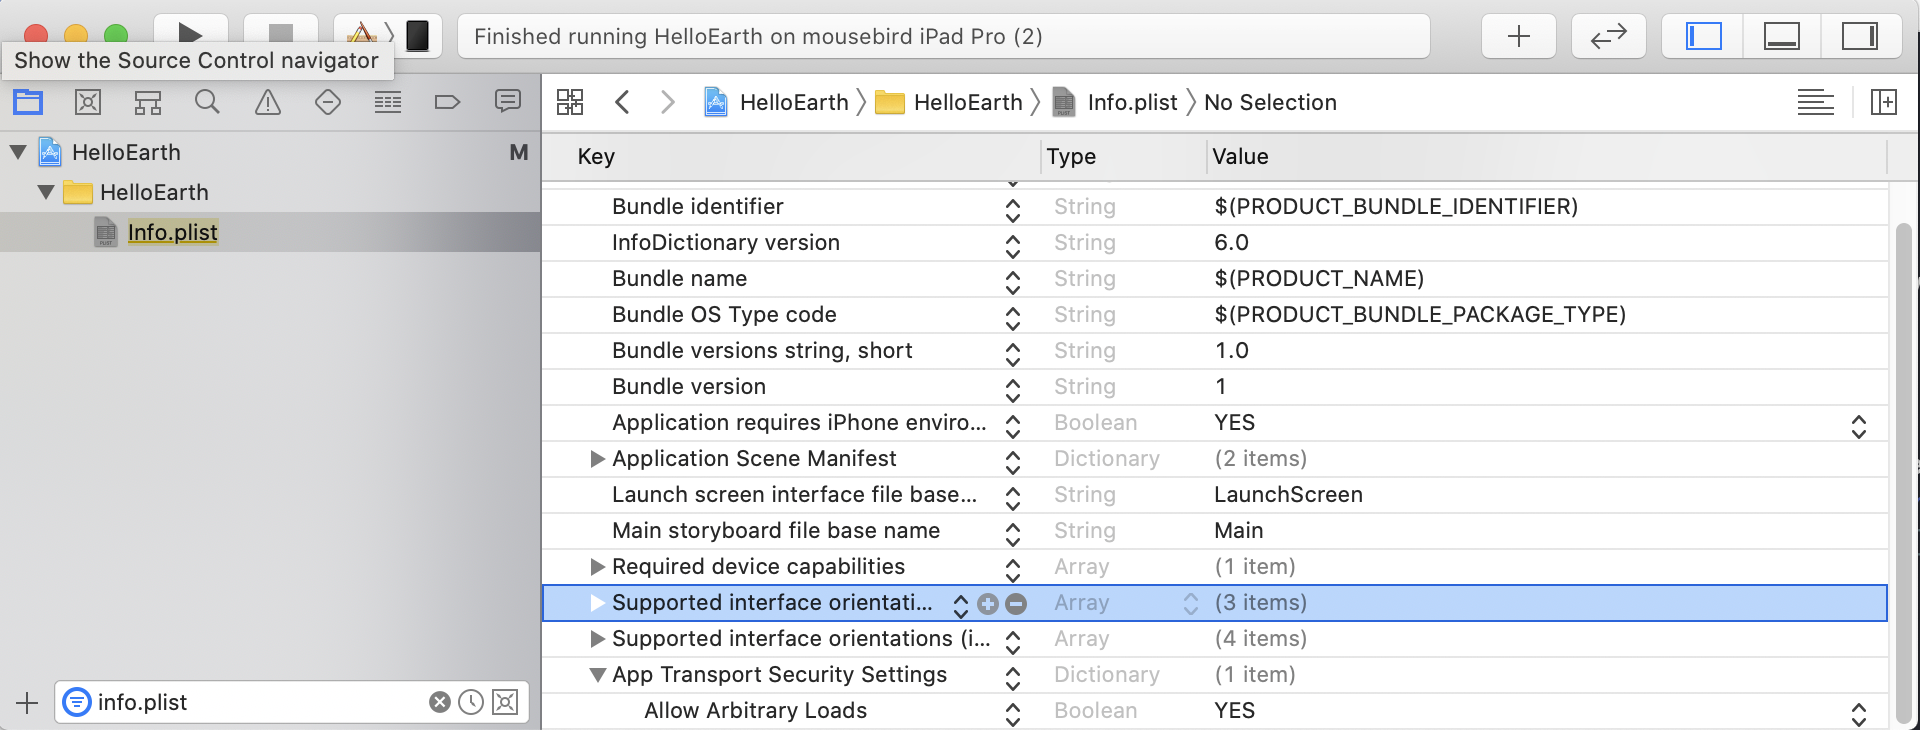
One more bit of housekeeping. Our tile source does not support HTTPS, so we need to configure the app to be allowed to make HTTP requests. Just open your Info.plist file, and add the key “App Transport Security Settings”. Inside that, add “Allow Arbitrary Loads” key with value “YES”.
Remote Tile Source
Now for the fun bit. We’re going to point WG-Maply at a remote tile source and have it do the rest.
-
// Where do we get the tiles and were do we cache them? let cacheDir = NSSearchPathForDirectoriesInDomains(.cachesDirectory, .userDomainMask, true)[0] let thisCacheDir = "\(cacheDir)/stamentiles/" let maxZoom = Int32(16) let tileInfo = MaplyRemoteTileInfoNew(baseURL: "http://tile.stamen.com/watercolor/{z}/{x}/{y}.png", minZoom: Int32(0), maxZoom: Int32(maxZoom)) tileInfo.cacheDir = thisCacheDir // Sampling parameters define how we break down the globe let sampleParams = MaplySamplingParams() sampleParams.coordSys = MaplySphericalMercator(webStandard: ()) sampleParams.coverPoles = true sampleParams.edgeMatching = true sampleParams.minZoom = tileInfo.minZoom sampleParams.maxZoom = tileInfo.maxZoom sampleParams.singleLevel = true // The Image Loader does the actual work imageLoader = MaplyQuadImageLoader(params: sampleParams, tileInfo: tileInfo, viewC: theViewC!) imageLoader!.baseDrawPriority = kMaplyImageLayerDrawPriorityDefault -
// Where do we get the tiles and were do we cache them?
NSString *cacheDir = NSSearchPathForDirectoriesInDomains(NSCachesDirectory, NSUserDomainMask, true)[0];
NSString *thisCacheDir = [cacheDir stringByAppendingString:@"/stamentiles/"];
MaplyRemoteTileInfoNew *tileInfo = [[MaplyRemoteTileInfoNew alloc] initWithBaseURL:@"http://tile.stamen.com/watercolor/{z}/{x}/{y}.png" minZoom:0 maxZoom:16];
tileInfo.cacheDir = thisCacheDir;

// Describes what the file covers and how deep
MaplySamplingParams *sampleParams = [[MaplySamplingParams alloc] init];
sampleParams.coordSys = [[MaplySphericalMercator alloc] initWebStandard];
sampleParams.coverPoles = true;
sampleParams.edgeMatching = true;
sampleParams.minZoom = tileInfo.minZoom;
sampleParams.maxZoom = tileInfo.maxZoom;
sampleParams.singleLevel = true;

// Actually loads the images
imageLoader = [[MaplyQuadImageLoader alloc] initWithParams:sampleParams tileInfo:tileInfo viewC:theViewC];
imageLoader.baseDrawPriority = kMaplyImageLayerDrawPriorityDefault;
If you worked through the Local Imager Layer example, this is pretty familiar. The new bit is setting up the MaplyRemoteTileInfoNew object. We give that a replacement URL with the x, y, and z to be filled in. We also provide a min and max zoom level.
We don’t want to keep fetching the same data repeatedly, so we’ll give that TileInfo object a cache directory to use as it sees fit. The system will clean these up over time, so don’t sweat it. If you need to clear the cache, just clear the directory.
You may also notice we’re not setting a Fetcher this time. There is one behind the scenes, a RemoteTileFetcher, but we don’t make you set it up. You can if you like.
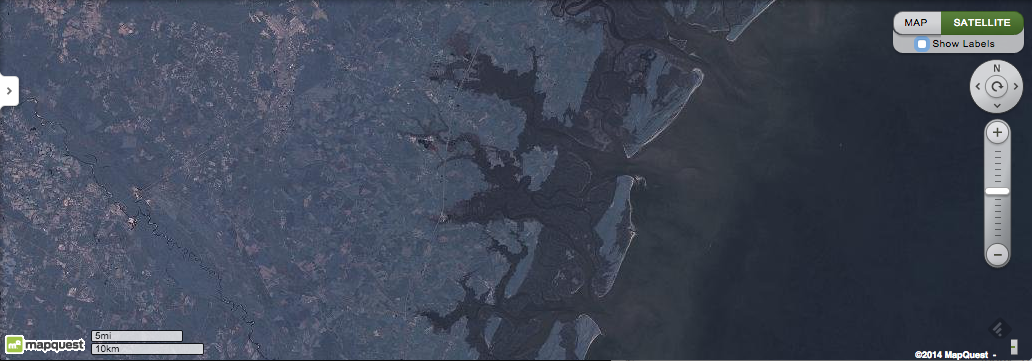
Build and Run
Give it a try. It’s even more fun on a device. You can zoom in to your heart’s content, provided your heart doesn’t desire submeter resolution.

All that with just a few lines of code. WhirlyGlobe-Maply is doing a lot of work behind the scenes. As you move around it pulls in new data, caches it to the local device, displays it, gets rid of the old data and so forth. But setting all this up is easy.
Next up, let’s overlay some data on here. How about some vectors?